Magic Circle Crochet Tutorial
Introduction
The magic circle is one technique that many people have trouble with at the start but it’s such a fantastic way to start projects without leaving holes in your circle! This technique allows you to start a project in the round with an adjustable circle. The adjustable circle tightens to reduce the hole that you would normally get using other methods.
I started using the magic circle more because I did not like the hole I was getting when using other techniques. Before this, I used to chain and join, but no matter what size hook or how tight my stitches were, I still ended up with a gap/hole and it drove me bonkers, especially since I wanted a uniform and consistent pattern.
Today in this tutorial, you will learn more about the magic circle and follow along using step by step instructions with pictures. I have also included links to helpful video tutorials from other creators as well, if you prefer seeing the steps in action.
DISCLOSURE: This post contains affiliate links, meaning if you click on a product or service, and decide to purchase it, I may receive a commission at no extra cost to you. All recommended products and services are based on my experience with them. For more information, please read my Disclaimer.
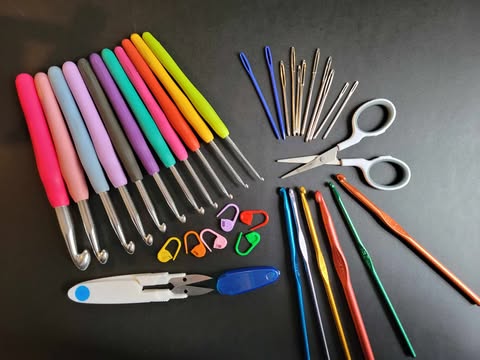
What You'll Need
- Yarn – I recommend using a standard worsted weight or similar yarn that isn’t fluffy or complicated so you can see the stitches while learning.
- Crochet hook – choose an appropriate size for the yarn you will be using. I prefer using a J hook for this when practicing but use what feels most comfortable or is recommended on the label of the yarn being used.
Step-by-Step Magic Circle Tutorial
Lets break this down into 2 different parts. The first part being making the circle itself. The second part is working the stitches into the ring/circle.
Creating The Magic Circle Ring
Step-By-Step Image Tutorial
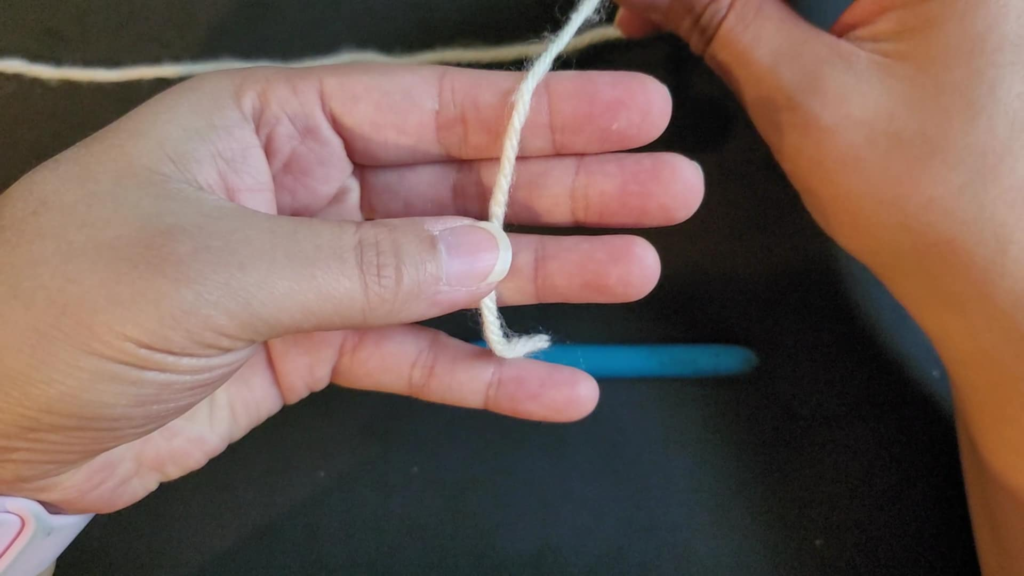
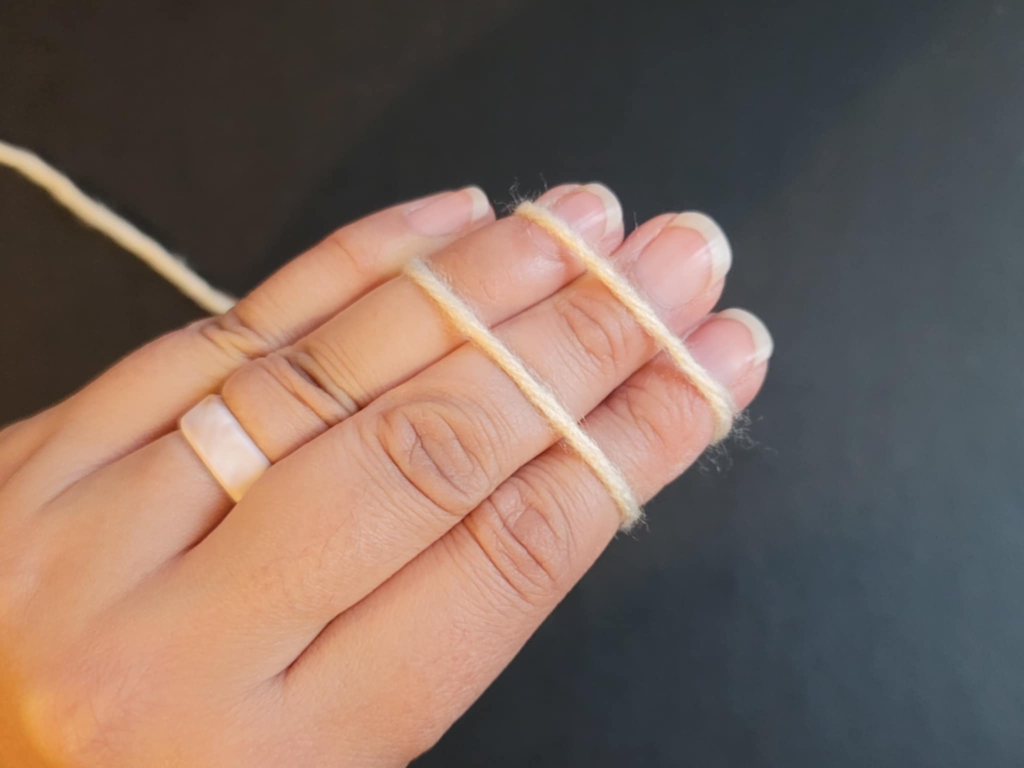
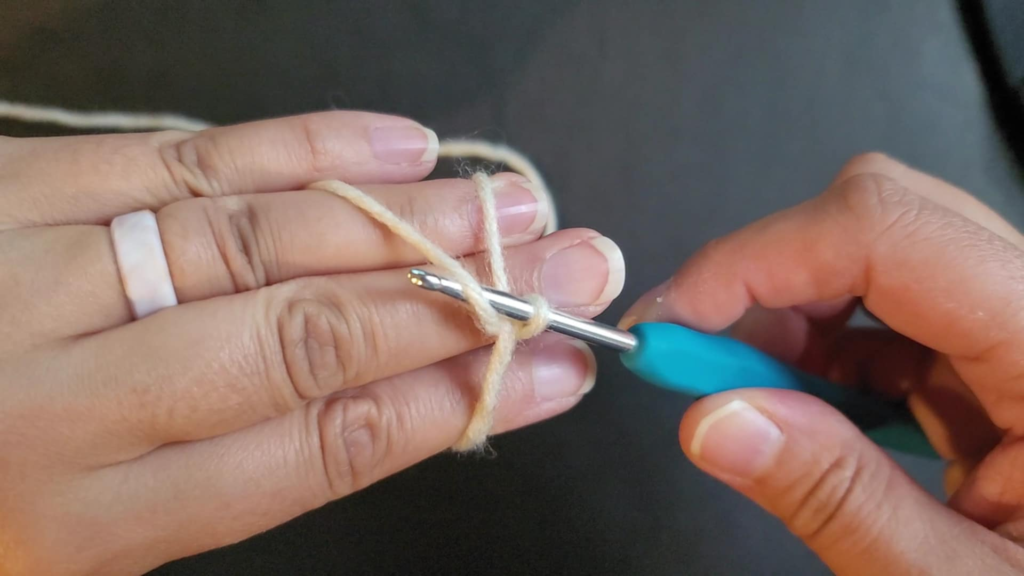
1: Have your hand open with your palm facing you and your fingers together. Hold a little above the start of the yarn and secure with your thumb against your ring finger.
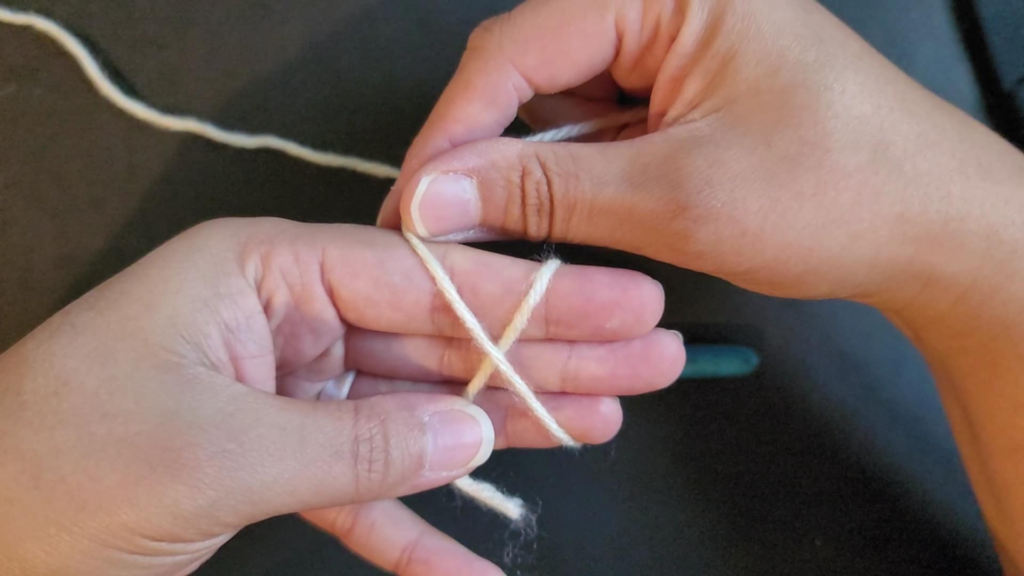
2: Wrap the yarn up, over, and behind the three fingers. Wrap the yarn up, over, and behind your fingers again making sure to form an “X” with the yarn on your palm-side. Use your pinky and thumb to hold the yarn tail and the rest of the yarn on place.
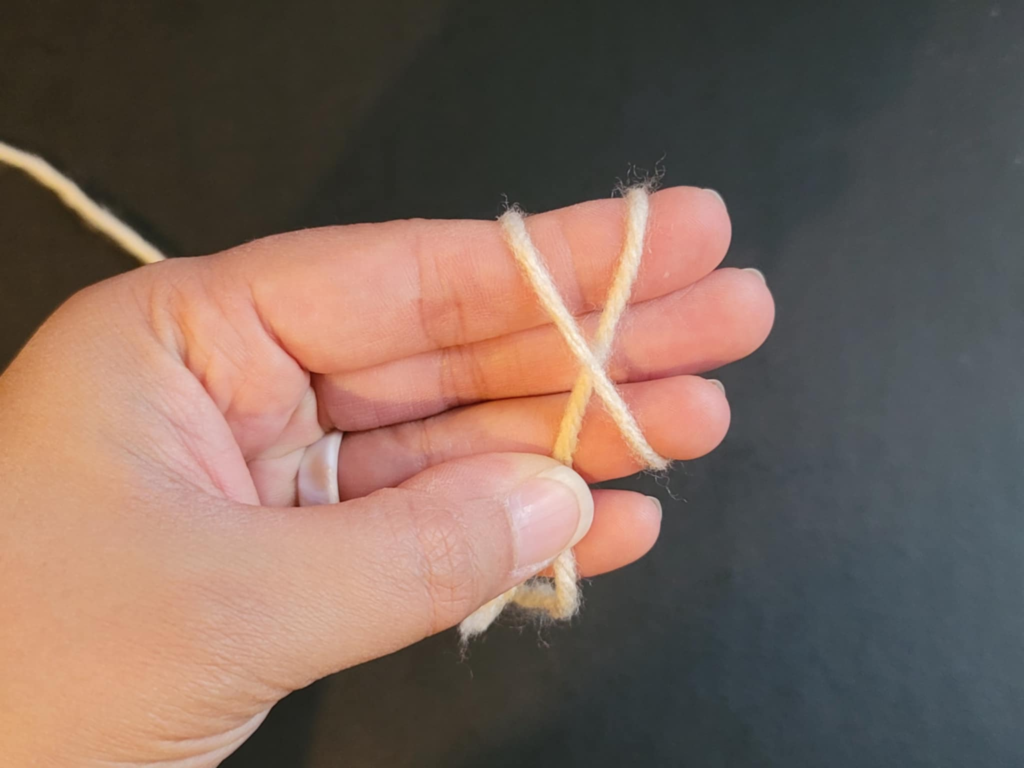
3: Position the yarn you wrapped around your fingers in front of your pinky and place the short starting yarn string right next to it. Use your pinky and thumb to hold the yarn tail and the rest of the yarn in place.
4: Flip your hand over. You should now see two parallel yarn lines show on the back of your hand. The palm side has the X, the back of your hand has 2 parallel yarn lines.
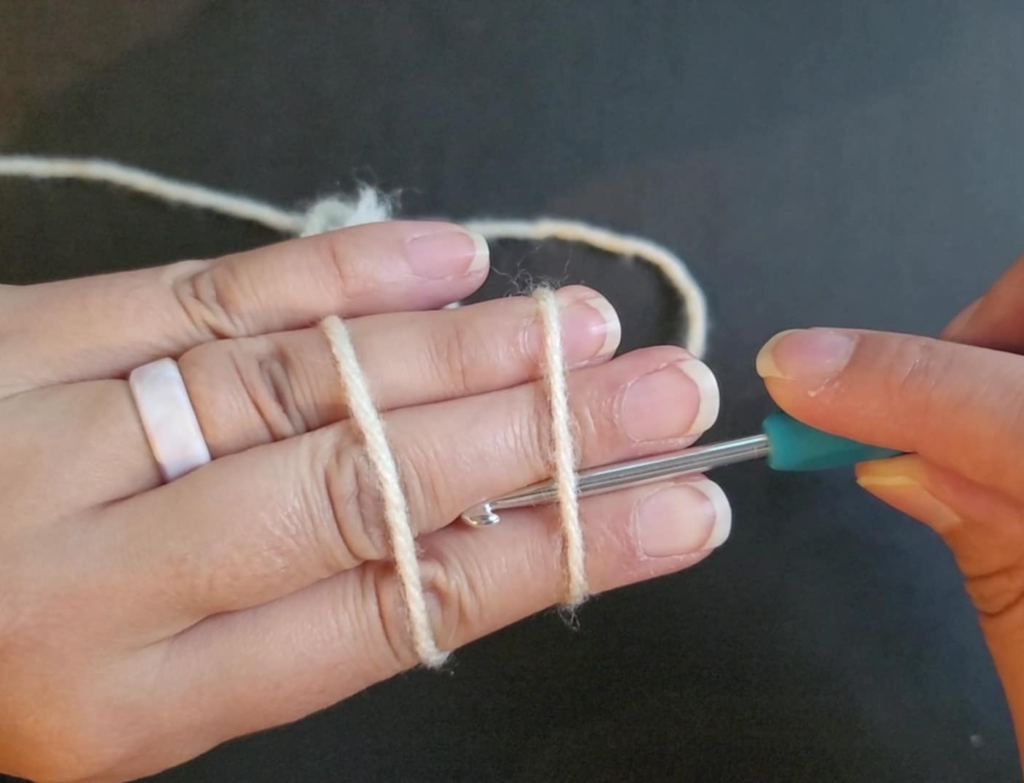
5: Using your hook, feed it under the first line of yarn closest to your fingertips.
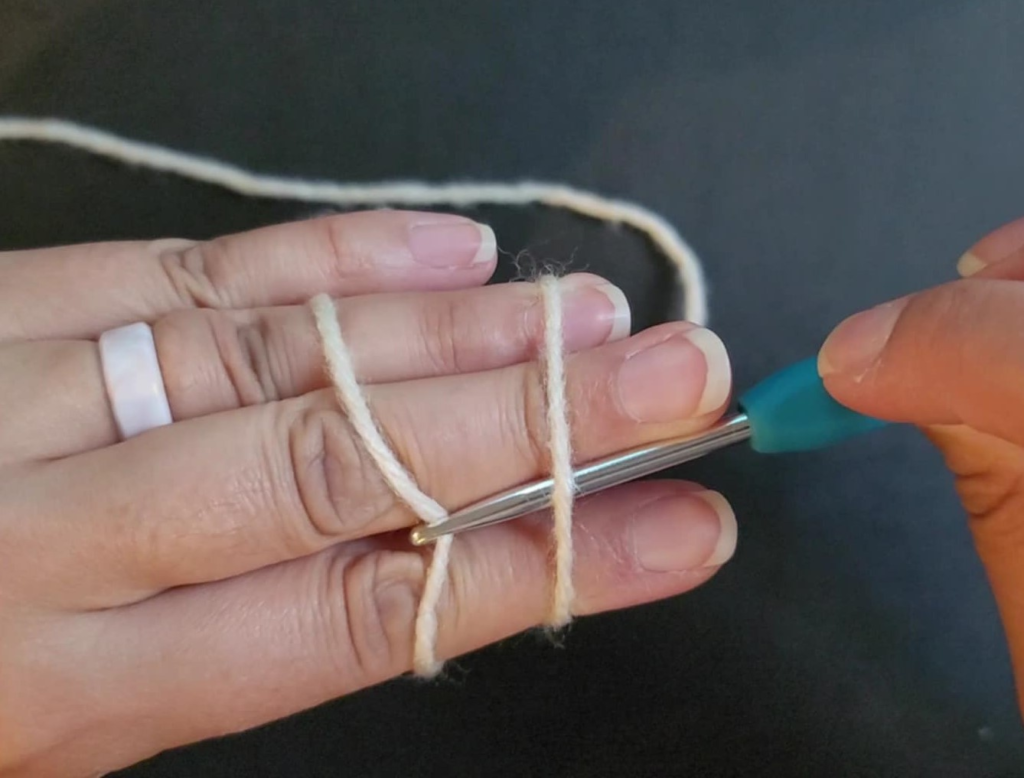
6: Grab the 2nd line of yarn with the hook and pull through.
7: Once that 2nd line of yarn is pulled though from Step 6, twist the hook in a clockwise motion so the hook points toward your pinky (this creates a twisted loop on the hook).
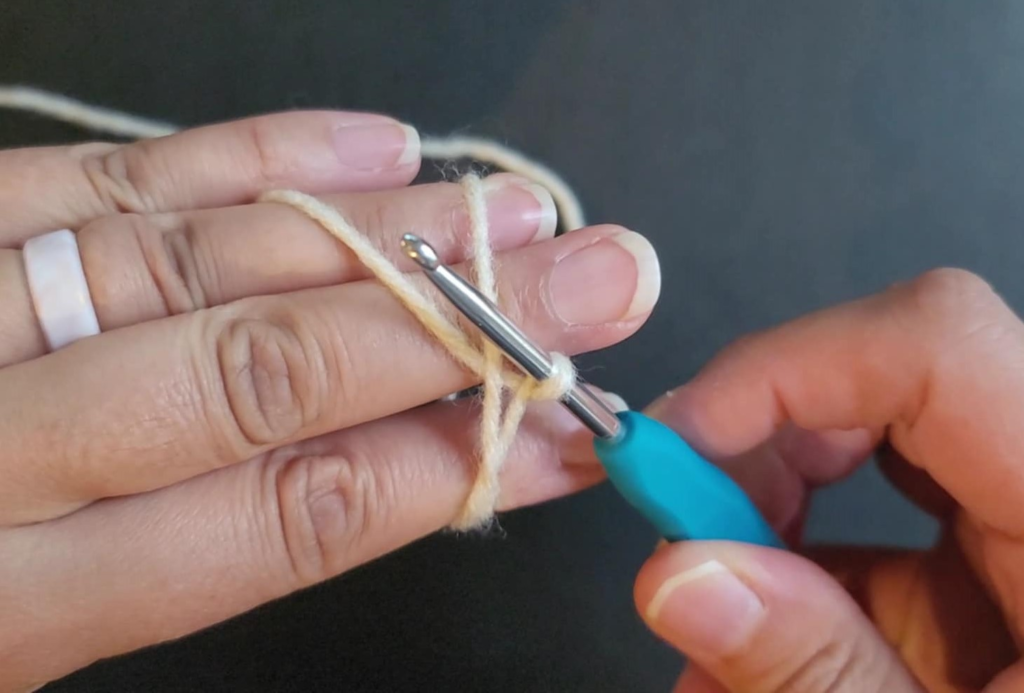
8: With the twisted loop still on the hook, keep your hook over the first yarn line and grab the 2nd line of yarn close to your pinky with the hook, and pull through the twisted loop currently on your hook.
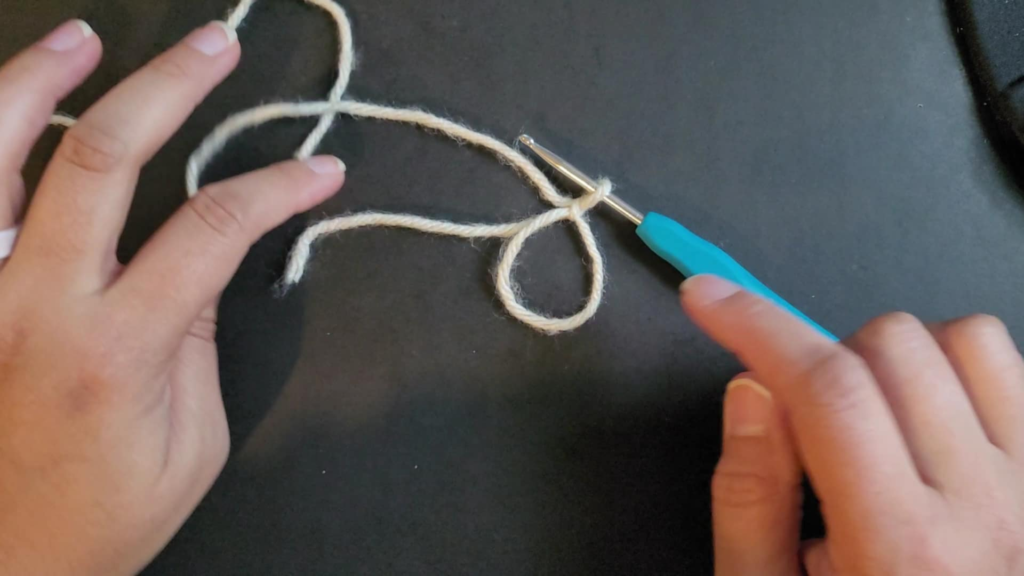
9: Keep your hook in the loop and let go of your newly formed magic circle. Then celebrate that you did it!
Shortened Written instructions
Step 1: Have your hand open with your palm facing you and your fingers together. Hold a little above the start of the yarn and secure with your thumb against your ring finger.
Step 2: Wrap the yarn up, over, and behind the three fingers. Wrap the yarn up, over, and behind your fingers again making sure to form an “X” with the yarn on your palm-side (the “X” is showing on the palm-side, two parallel yarn lines show on the back of your hand). Use your pinky and thumb to hold the yarn tail and the rest of the yarn on place.
Step 3: With the yarn secured by pinky and thumb, turn your hand over to show the 2 parallel yarn lines. Take your hook, feed it under the first line of yarn closest to your fingertips. Grab the 2nd line of yarn with the hook, pull through, then twist the hook in a clockwise motion so the hook points toward your pinky (this creates a twisted loop on the hook).
Step 4: With the twisted loop still on the hook, keep your hook over the first yarn line and grab the 2nd line of yarn close to your pinky with the hook, and pull through the twisted loop currently on your hook.
Step 5: Keep your hook in the loop and let go of your newly formed magic circle.
You've now created the initial structure of the magic circle. Next is a walk-through on how to work single crochet (sc) stitches into the circle and tighten it for the finished result.
Working Stitches Into The Ring
- Step 1: With the loop on your hook from making the initial magic circle ring, chain (ch) 1.
- Step 2: Typically we go through an existing stitch to create a stitch. You will be putting your hook through the circle instead. When the hook is through the circle, yarn over and pull back through the circle. Yarn over the hook again making sure you will be creating the stitch around both the magic circle ring AND the yarn tail, and pull through the loop on your hook to finish the single crochet (sc) stitch.
- Step 3: Work your remaining stitches into the ring
- Step 4: Secure with a slip stitch (sl st) into the first stitch
- Step 5: Pull the yarn tail to close the circle

Video Resources
These video tutorials that were incredibly helpful to me when I was learning how to master the magic circle technique, so I wanted to make sure I shared them with you. The creators did a fantastic job showing and explaining the process.
From Bella Coco
From Lexie Loves Stitching
From Double Dutch Crochet
Common Mistakes & Troubleshooting
Remember that there is NO typical slip knot when making a magic circle.
Ring won't tighten
Are you crocheting over both the ring and the yarn tail? Pull the tail slowly while using your other hand to keep the stitches around the ring in place.
Stitches falling out
Don’t be too stingy with the amount of tail you leave for the magic circle. There should be enough yarn tail available to stitch over, to pull to eventually tighten the circle, and to weave in to finish.
Ring too tight to work into
Check if this is a tension problem. Tight stitches can also be caused by not working your first stitches over the yarn tail in the magic circle.
Wrong tail being pulled
This could be as easy as not looking at which string of yarn you are pulling. If you’re pulling the one that is actually supposed to be the tail and it’s still not working, review the steps for making a magic circle again and try starting over. Your initial steps may not be done correctly.

When to Use a Magic Circle
Magic circles are best used when working in the round or when you need a tight center in your starting circle/loop.
- Amigurumi projects
- Hats and beanies
- Granny squares
- Other circular projects
- Baskets
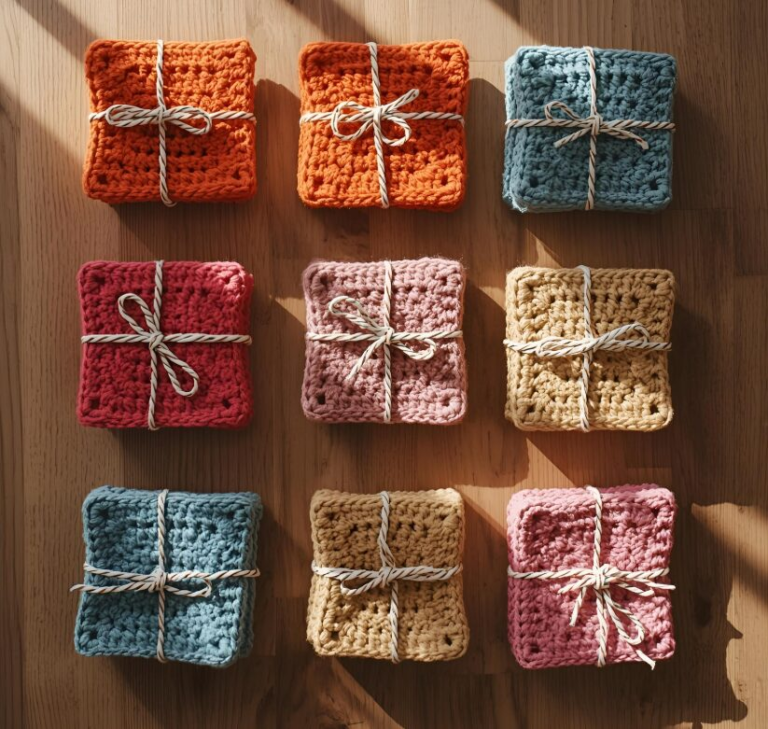
- Coasters
- Face scrubbies
Magic Ring Alternative
However, if you really just cannot seem to get this magic circle/ring down, have no fear. Here are some alternatives you can try that will give a similar result.
Check out this helpful video from Bella Coco
The Magic Chain method is also an alternative to the magic circle.
Next Steps
The magic circle is notorious for being tricky to master, so don’t be too hard on yourself while learning. Try different ways to learn this method as a different learning style may work better for you for this particular technique.
Start with beginner projects such as face scrubbies, coasters and other easier circular starting patterns for practice.
Did it take you a while to learn the magic circle? What eventually helped you master it? Let us know in the comments!


This was a great tutorial. I tried to learn how to make a magic circle not long ago, but I couldn’t get the hang of it. Your instructions made it make perfect sense!
Great tutorial! Trying to relearn how to crochet and the magic circle has been a challenge. Thank you for the great tutorial and tips.
You’re very welcome!