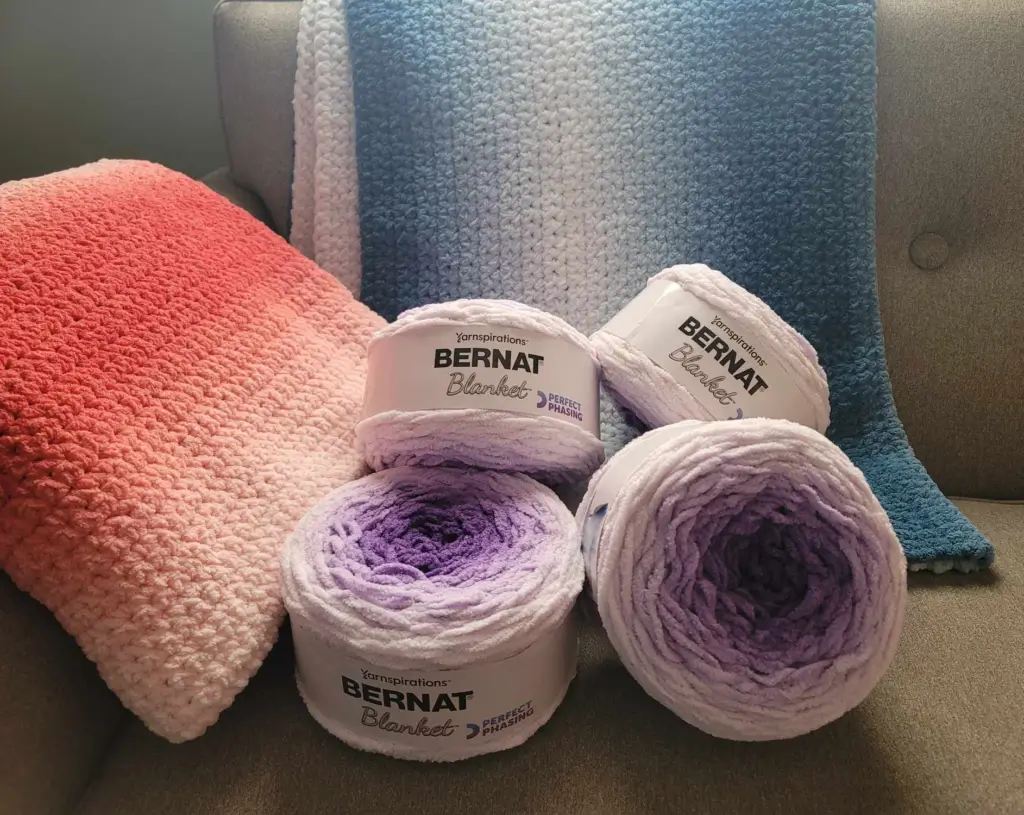
Bernat Perfect Phasing Yarn – Simple and Beautiful
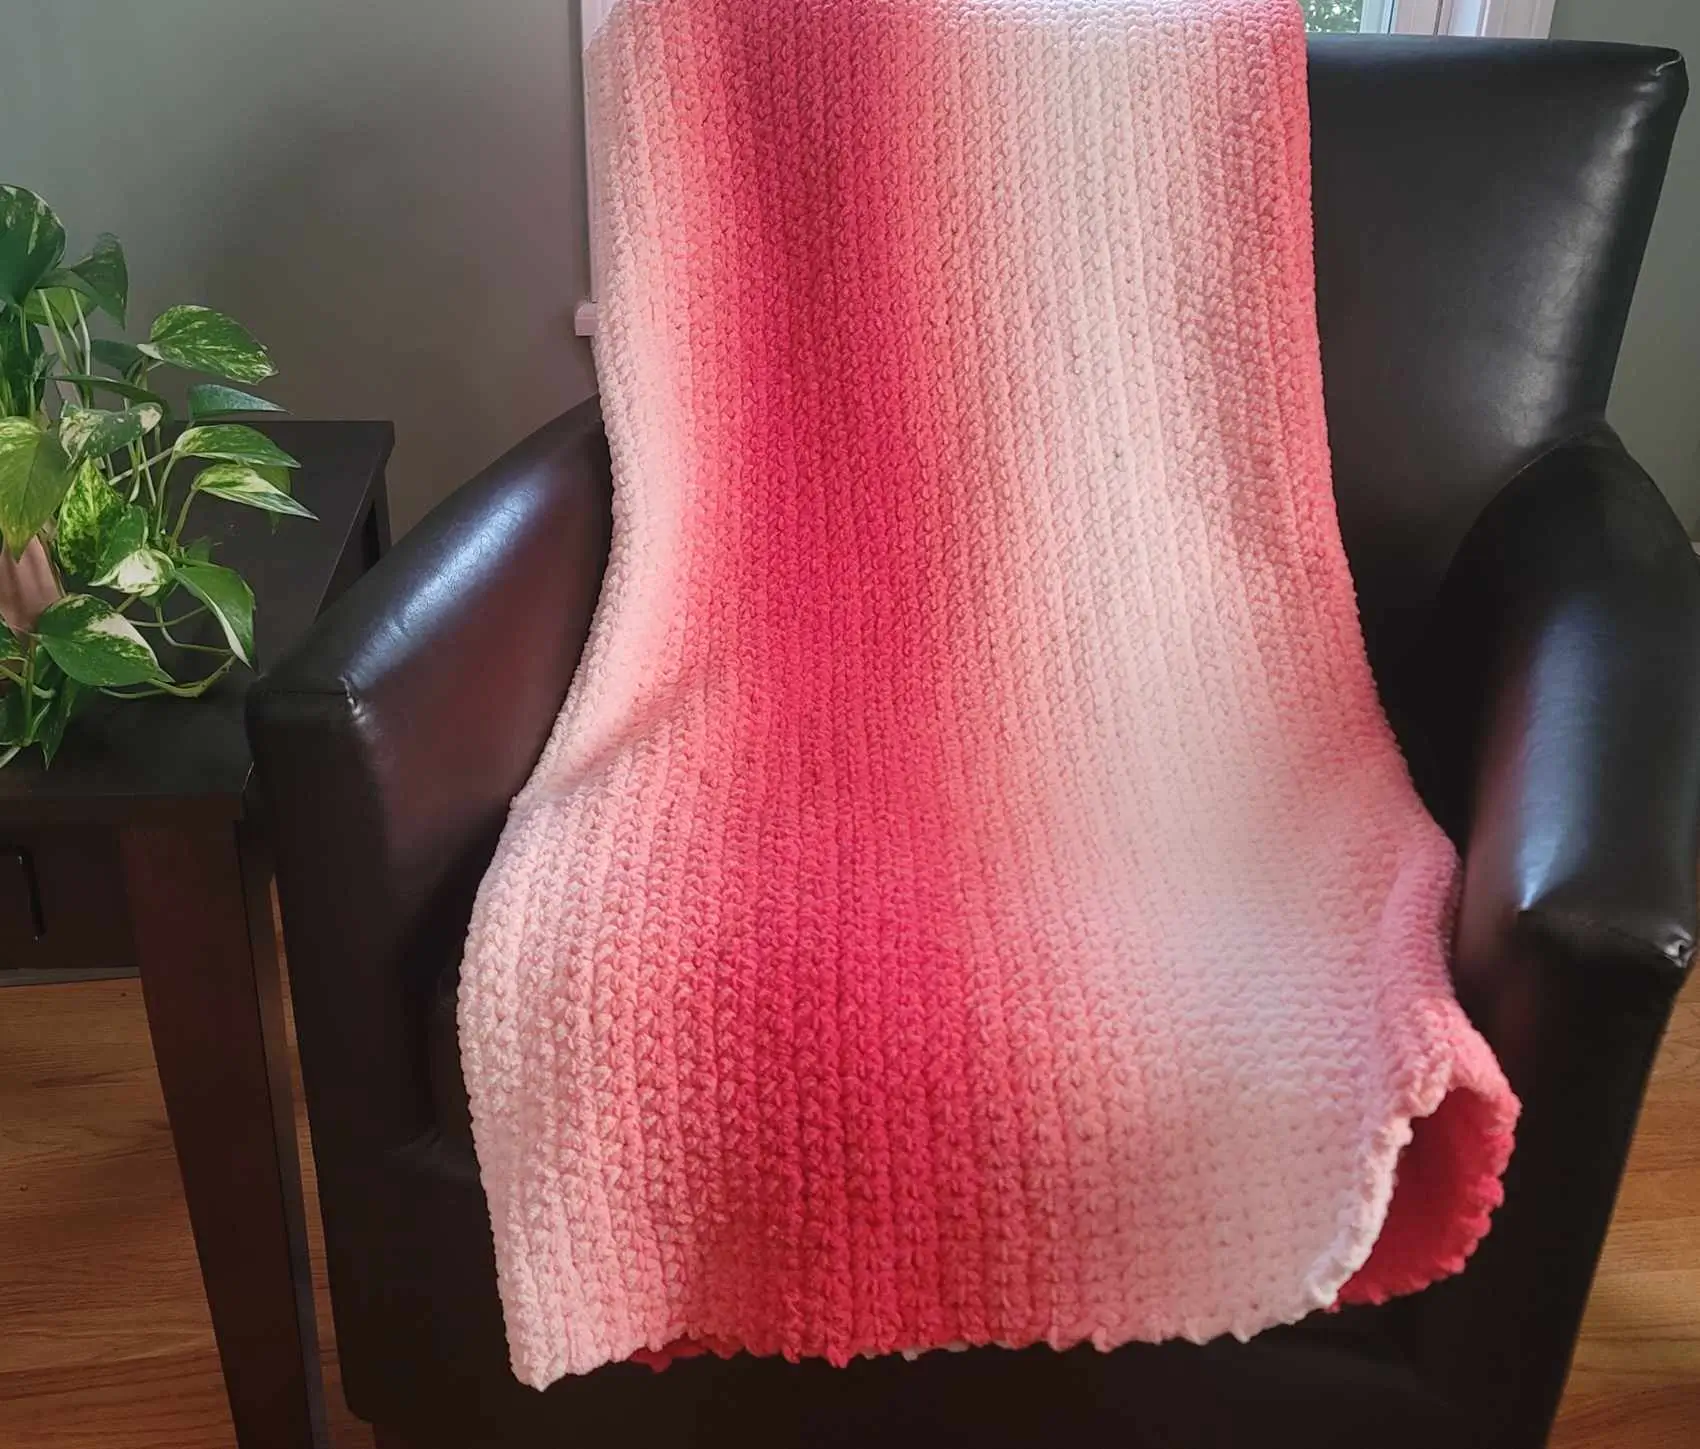
I LOVE phasing blankets right now. I’m absolutely hooked on them (….maybe a little pun intended there!). The Bernat Perfect Phasing yarn is soft and considered “super bulky” but since it’s a 6 (yarn weight) it’s not as chunky as some of the other yarns out there (just my opinion). It’s a perfect yarn for a lighter weight blanket but still with all the comfort! Not to mention that it looks beautiful when using simple stitches which makes it a perfect late beginner/early intermediate blanket! (the stitches are beginner stitches but due to the bulkiness of the yarn, keep in mind it can be tricky to use and count stitches)
DISCLOSURE: This post contains affiliate links, meaning if you click on a product or service, and decide to purchase it, I may receive a commission at no extra cost to you. All recommended products and services are based on my experience with them. For more information, please read my Disclaimer.
What to consider before using this yarn
- The project – what are you going to make with it?
- Is this the best yarn for your project?
- Do you want to phase with only one color or do multiple colors?
- How do you want your phase pattern to start and end?
RELATED: Crochet: How to start as a beginner
Things you MUST KNOW before using this yarn
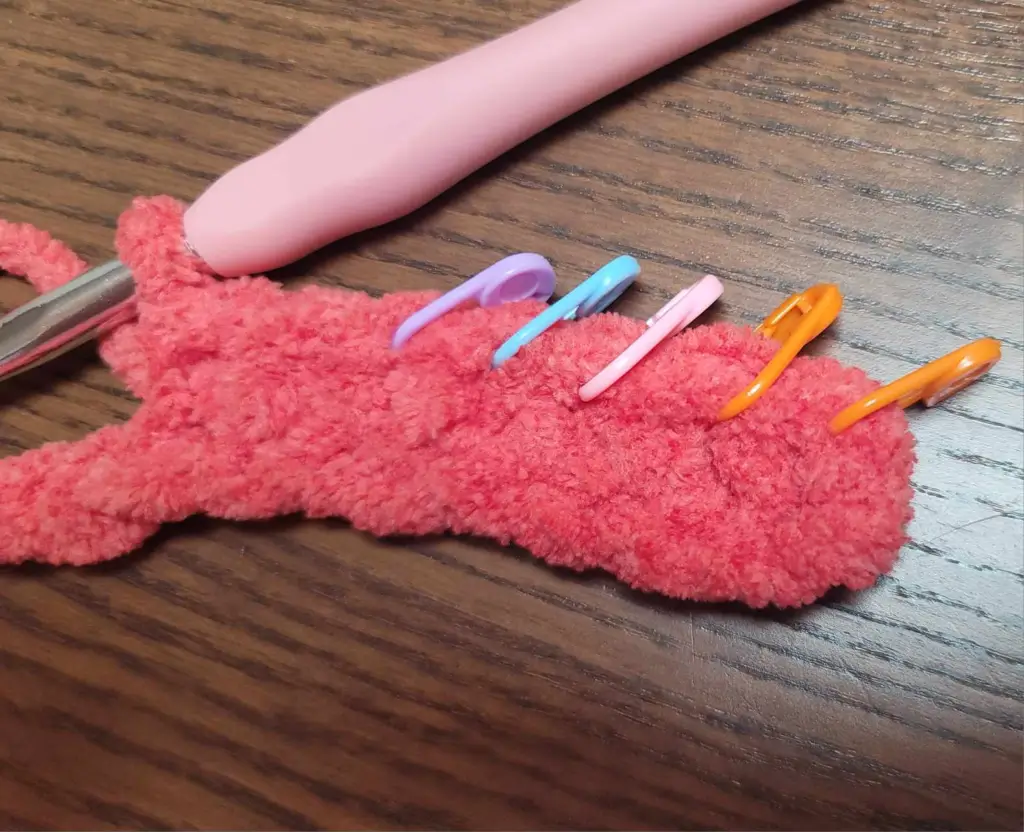
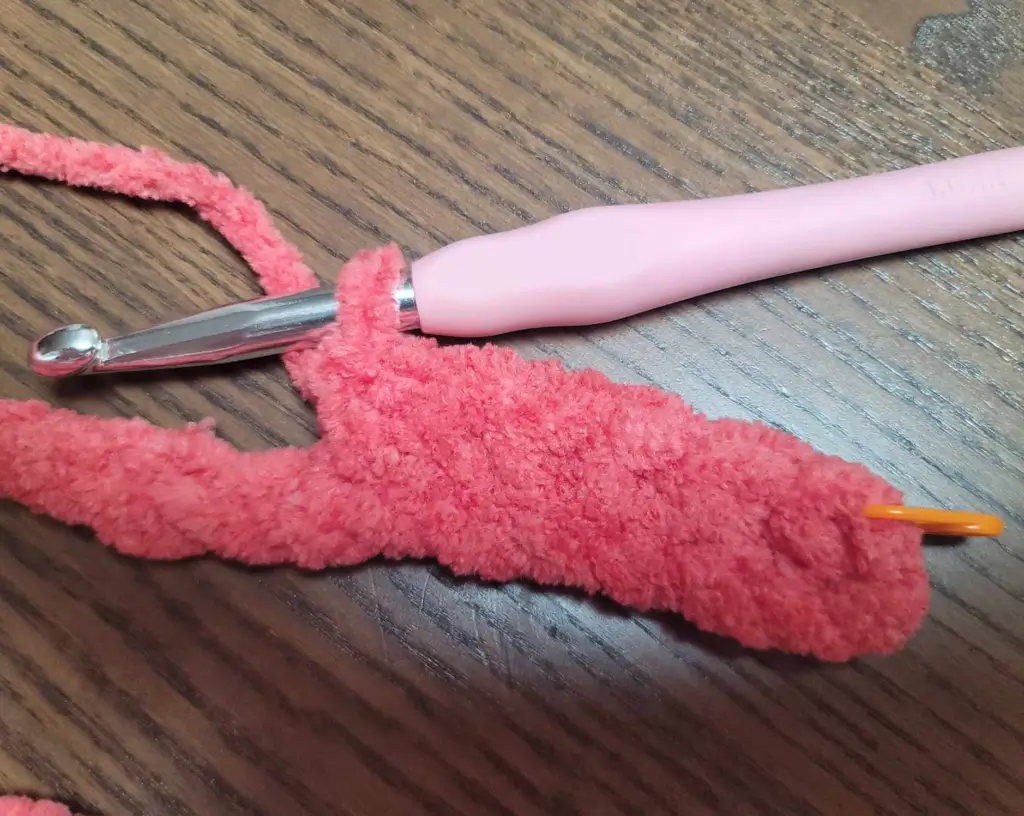
- You should be familiar with what stitches look like and know how to count stitches. Bernat Perfect Phase yarn is a super bulky yarn, so even though it’s thinner than others, it’s still fuzzy and individual stitches can be difficult to see and count.
- Tension – Maintain consistent tension through your project to avoid curving or unwanted gaps between stitches. See my post about suggestions on How To Improve Crochet Tension for more information.
So far, I’ve only used this yarn for blankets, but it would be great in so many other projects too, a sweater, scarf, hat, amigurumi, etc. Almost any project that looks great with color changes. Lets talk about making a simple yet beautiful Perfect Phasing blanket!
Grab An Audio Book
I like to multitask, so while I crocheted this blanket I was coincidentally listening to an audio book while making this blanket called Rebel Witch by Kristen Ciccarelli.
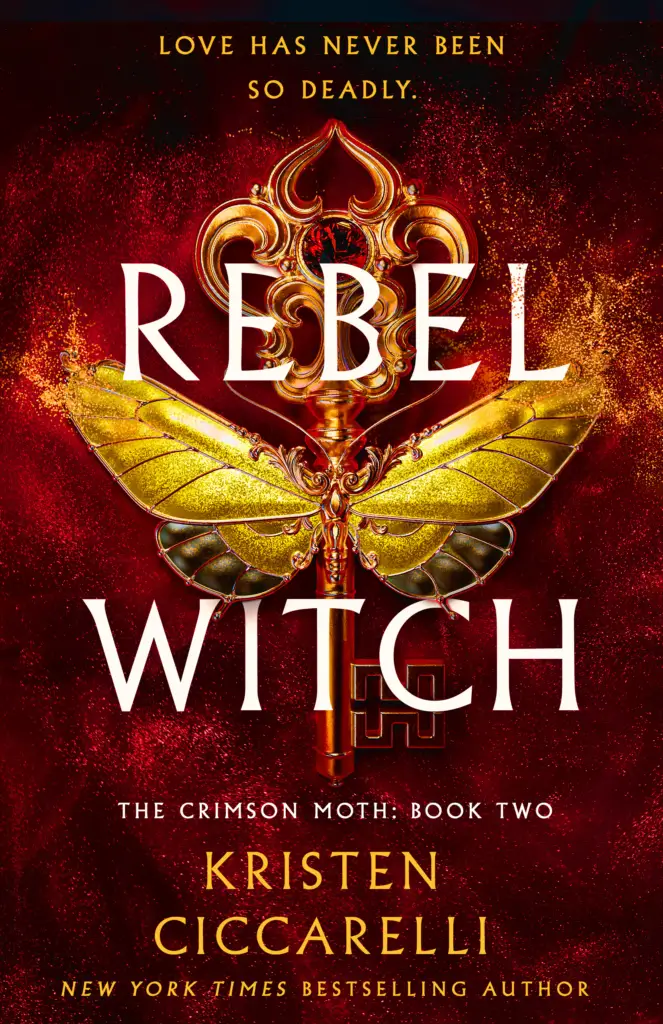
It’s the second book of her Crimson Moth series and it just so happens that used the Perfect Phasing yarn “Crimson” color. It’s a coincidence, I promise that I didn’t plan that! If you like reading and wish you could crochet at the same time, check out audio books! You can still get that reading time in AND stay on the hook!
RELATED: Reading and Crochet
Where to buy Bernat Perfect Phasing Yarn
- Shop Yarnspiration’s Yarn Collection and check out the Bernat Blanket Perfect Phasing yarn. They also have it in Extra Thick!
- Hobbii doesn't have the “perfect phasing” yarn (at the time of this post), but they have other Bernat Blanket Yarn that looks just as great using this pattern!
- Also check your local craft and yarn stores. If they don’t have them in store, you may be able to purchase them online and have it shipped directly to you.
Perfect Phasing Throw Blanket Pattern
Materials
(Affilliate links are included on some of the types I like and use)
Bernat Blanket Perfect Phasing yarn – Crimson (6 skeins)
Hook: L-11 (8 mm)
Stitch markers (optional)
Measurements
Approx 61 in (1549.4mm) length x 53 in (1346.2mm) width
(The direction of the phased stripes are meant to go up and down the length of one's body)
Gauge
A gauge that is 6 stitches wide x 6 stitches tall is approx 3 in (76.2 mm) x3 in (76.2 mm)
Abbreviations
Approx = approximately
ch = chain
Sc = single crochet
st(s) = stitch(s)
rep = repeat
NOTE
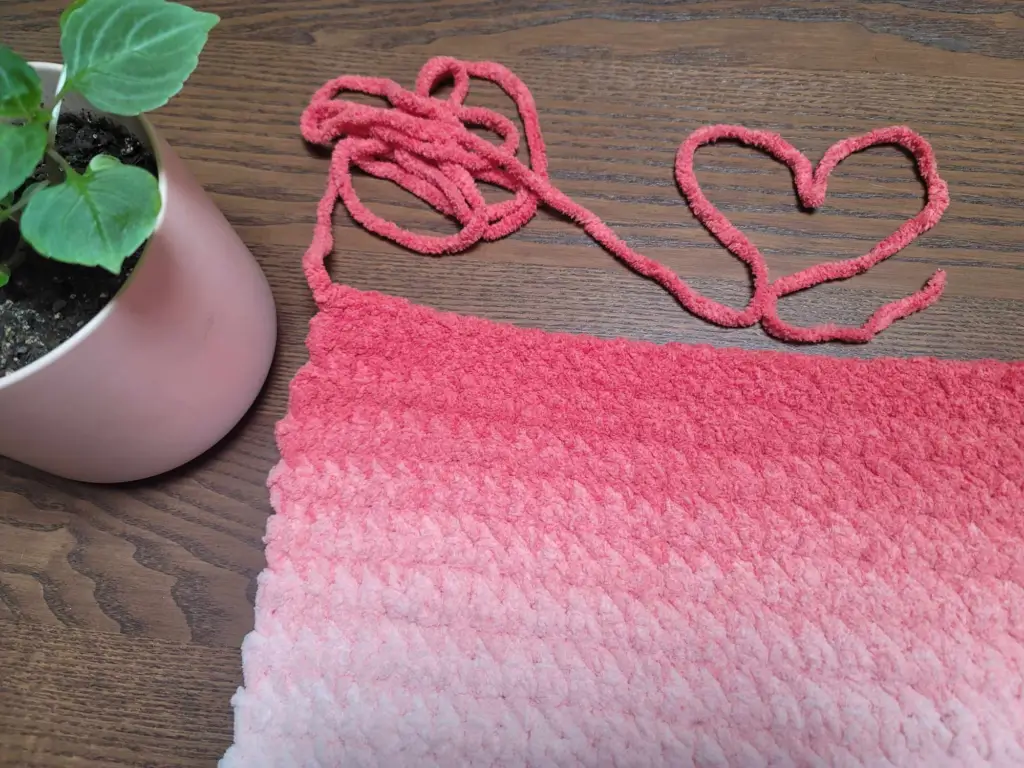
For this pattern I am only using one color phase yarn color called, ”Crimson”. Also, this pattern has not been tested by others, but I've already made 2 of these using this pattern. I just wanted to share what I typically do when I make my phase blanket. Other creators may do something similar or do something different, but in the end it's all up to what you like 🙂
Beginners: To make the phase look seamless, attach “like” colors/shades together. For example, the yarn I am using for this pattern is light on one end and darker on the other. When I join my skeins, if I end with dark, I will start the new skein with the dark color. Light to light, dark to dark. You will need to change where you pull from on the skein (pulling from the center vs the outer part of the skein).
Instructions
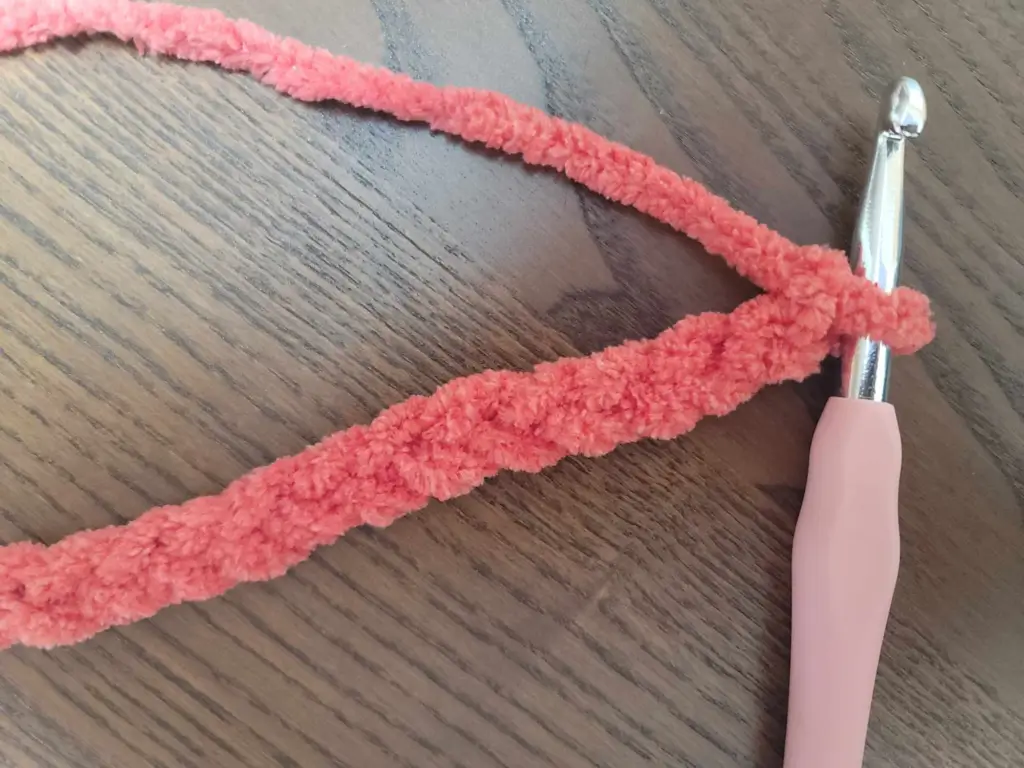
Foundation chain: Ch 131 (ch 130 + 1 extra ch to start the first row)
(You can chain the desired width of the throw you’d like to make, if you want to make a bigger or smaller blanket, but try to end in an even number of stitches).
Row 1: Start your first row of sc in the second stitch from the hook. Continue sc in each ch to the end of your foundation chain. After the very last sc is completed, ch 1, and turn your work. (You should have a total of 130 sc + 1 ch for the turn)
Beginners: When you turn your work, your hook should now be on the opposite side. For example, when ending the chain stitches, your hook will be on your right and the rest of the chain will be on the left side of the hook. When you turn your work, your work will now be on the right side and your hook will be on the left side.)
Row 2: Make your first sc for this row in the second stitch from the hook. (Place a stitch marker in this first stitch if you are still learning or have trouble identifying individual stitches (we all have off days, so don’t feel self conscious about using stitch markers! I use them all the time!). Continue 1 sc in each stitch until the end of the row. After making the last sc, ch 1, and turn your work.
Beginners: As you progress in this pattern, take out the stitch marker in your previous “last stitch” of the row and move it up to the last stitch of the new row you start. This helps let you know where your last stitch. This is how you will easily know you only have to do the ch 1 and turn to start the next row)
Row 3 – approx Row ??: Repeat Row 2 instructions for your remaining rows. Continue this until you use all 6 skeins.
~~~~~~~~~~~~~~~~~~~~~~~~~~~~~~~~
How to add the next skein:
At some point you are going to run out of yarn. To add the next skein to your current project you can do this multiple ways. Choose the way that is most approachable or that works best for you.
*Make a small knot: One of the easier ways to join two skeins of the same color is to tie the end of your current skein to the end of your new skein using a small knot. The goal is to attach the two pieces together but have a small enough knot to not notice where you joined the two. This can be referred to sometimes as the “magic knot.” Check out this tutorial from Bella Coco if you need a good visual!
*Drop the old yarn, add new yarn: Another method that creates a nice transition between skeins as well as clean color changes, is to drop the old yarn and continue with the new yarn. To use this method, make your last stitch as normal but stop when you get to the last part of the stitch where you have 2 loops on your hook (don’t complete the last part where you yarn over and pull through to complete the stitch).
With the 2 loops still on your hook, “drop” (let go of) the old yarn (you will still have 2 loops on your hook), take the new yarn, loop the new yarn over the hook, and pull the new yarn through the 2 loops of the old yarn. Continue stitching with the new yarn. It sounds confusing but once you get the hang of it, it’s a fantastic way to join two skeins together. Check out this video from The Yarnist to see this in action!
~~~~~~~~~~~~~~~~~~~~~~~~~~~~~~~~~~~~~~~
Finish off: Make sure your very last sc is at the end of a row. Cut your yarn leaving a small tail to weave in later. Yarn over and pull the remaining yarn through the loop on your hook until the end of the yarn comes through and makes a small knot.
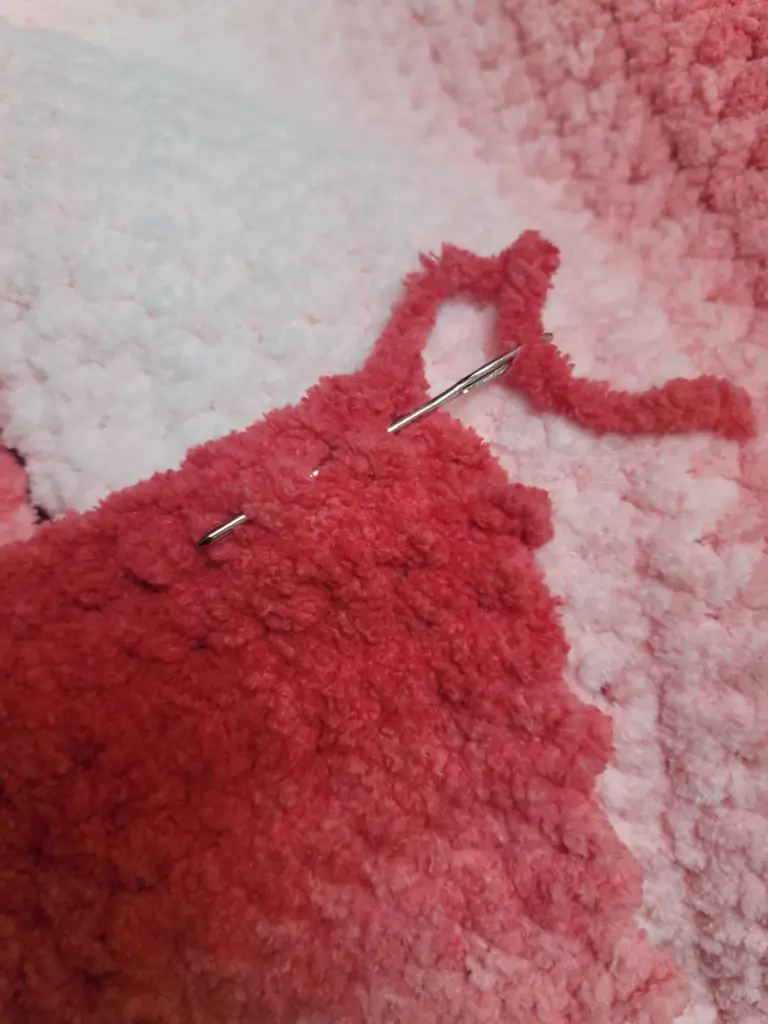
Weave in ends.
Beginners: Use the tapestry needle to sew in the ends. Try and go through the stitches themselves so the yarn tail will be less likely to accidentally escape. I usually do about 2 to 3 rows of going through 3 or 4 stitches weaving in to really try and lock it in there!
*Ok we are going to start celebrating now cause I'm proud of you for making it to the end of this pattern!*
Well?! How did it come out?! What do you think???
Like I said previously, I absolutely love this blanket because of the simple stitches and the simplicity of the final look. The perfect phasing yarn transitions make it look like you just bought the blanket from the store!
Comment below or send me a message letting me know how it went!


Thanks so much for this, Kimberly! I’ve been curious about the Bernat Perfect Phasing yarn, and your review really helped. I love that it gives a beautiful effect even with simple stitches—sometimes that’s exactly what you need for a relaxing project. I also appreciate the heads-up about the bulkiness making stitch counting a little tricky. That’s good to know before diving in.
You’re very welcome! There is a big draw to the bulky and more fun yarns, but sometimes they are difficult to work with. It’s worth it though if you take your time and know what you’re getting into ahead of time!
Love how the colors flow so effortlessly with the Bernat Perfect Phasing Yarn! It’s looks like such a simple way to add a beautiful ombre to any project.
Right?! It really is gorgeous 🙂
I’m not one to sit and knit…or sow for that matter but this is so pretty! It almost makes me want to…almost. Lol
If you ever have FOMO and end up trying it, let me know how it goes! 🙂
You are very talented! Beautiful color pattern.
Thank you, I appreciate the kind words 🙂
I tried to start doing something like this, but my life got so busy. You’re so talented! This takes a lot of patience too.
Thank you, I appreciate the kind words. What I love about this blanket is the yarn itself does all the hard work for you (the color work part). The stitches used are beginner stitches and it still comes out gorgeous! 🙂 Completely doable!
Wow, it’s so beautiful! Can I really do it as a beginner? It really makes me want to give it a try and have a personalized, cozy blanket for winter nights in front of the TV.
Thanks for sharing!
You can absolutely do this as a beginner! Just know that the counting of stitches may be a little difficult at first because of the fuzziness of the yarn (I included a pic in my post), but it’s very simple and you only use single crochet throughout the entire blanket for the main stitches! Even if your count is off a little, the blanket/pattern is very forgiving. I use a stitch marker to mark the first stitch of each row so I know where to start/end just in case I get distracted lol!