From Digital Design to Finished Blanket: My First StitchFiddle Crochet Logo Project
Introduction
I recently completed a large project for a family member. It was my first attempt at a crocheted logo blanket and I had no idea how to do it. There was also a lot of troubleshooting involved, and I wanted to share my mistakes and experience so that hopefully you can avoid some of the problems I encountered!
DISCLOSURE: This post contains affiliate links, meaning if you click on a product or service, and decide to purchase it, I may receive a commission at no extra cost to you. All recommended products and services are based on my experience with them. For more information, please read my Disclaimer.
The “Why”
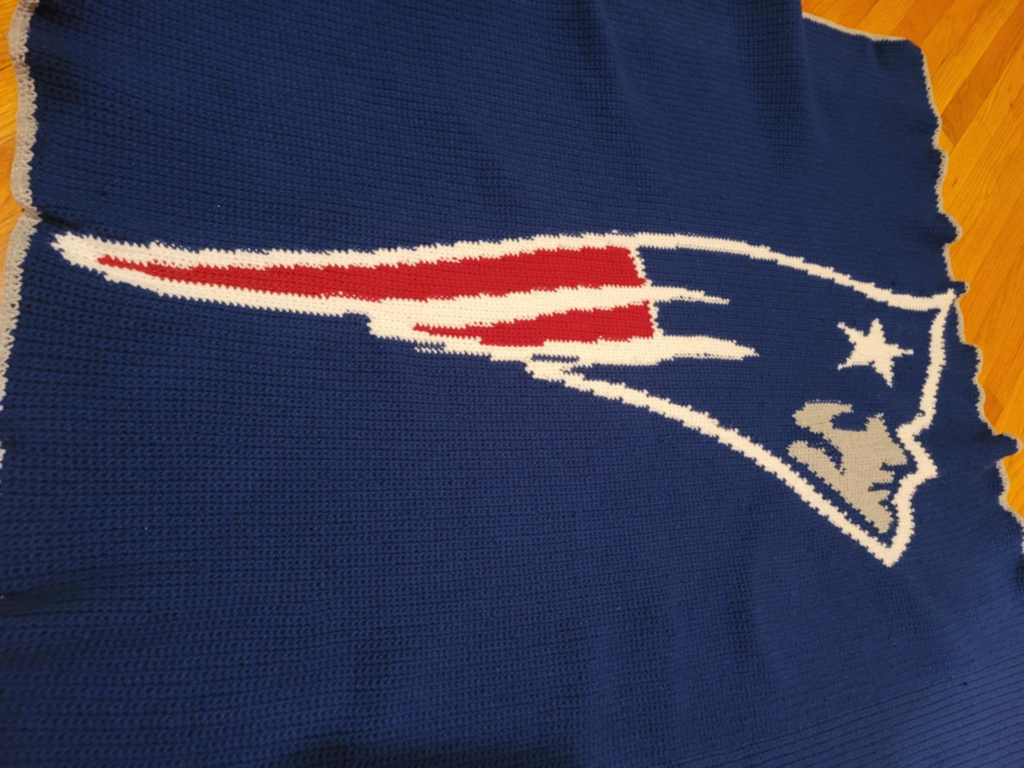
Many of my family live in New England, so when my sister mentioned that she wanted a Patriot’s Blanket, I knew that she was hoping I would be up for the challenge to make one for her to support her favorite team. Well, challenge accepted!
The Learning Curve
I know that this was something I hadn’t tried before, so I looked into the process of crocheting blankets with specific designs/patterns: C2C (corner to corner), graphghans, tapestry crochet, intarsia, filet, etc. After looking at all of the processes I decided to start with a tapestry crochet approach since the colors are carried through the work and my initial thought was that the less ends to weave in, the better.
I knew I would need to use some kind of design or graphing program to create the pattern for this blanket, so I did some research and came up with the following: StitchFiddle, PCStitch and WinStitch. There are more programs out there, but to me these seemed the most approachable.
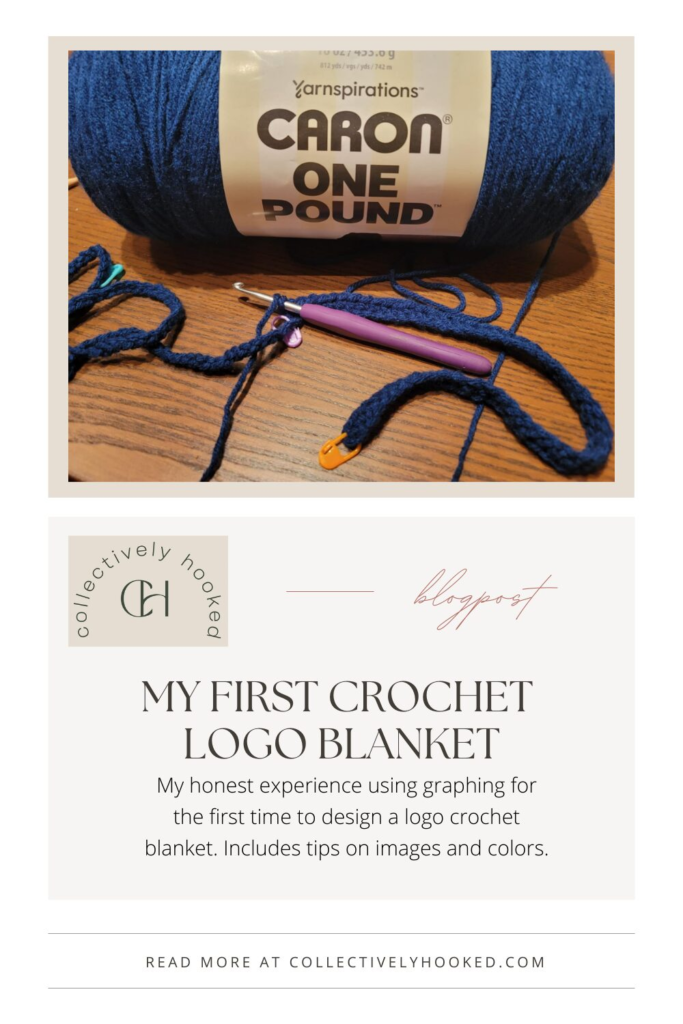
I turned to StitchFiddle since many others in the crochet and knit community have used this program. I had found a few online communities surrounding the use of this program and my plan was to graph out my project on my PC so it could be printed and kept with me in my project bag.
StitchFiddle (per their about page) is “ an online knitting, cross-stitch, and crochet pattern design community”. They have both free and paid premium account options, but I chose to go free since I wasn’t sure what I was in for.
The Process
I created a free account and got to playing around with StitchFiddle. It has a basic (not flashy) interface and the help section was very informative and useful when I was stuck trying to figure things out. I'm actually happy it’s not flashy, since my focus is more so on the project rather than what the program looks like.
Creating a new chart allows you to select options for your type of project and select the process you plan to follow (tapestry, C2C, etc). Charts you create are also saved under your account for you to access later.

Logo Conversion
During chart creation, you can either upload a picture or make your own design freehand within a blank chart. Since I was using a logo, I uploaded a picture of it. After uploading, my plan was to manually make any changes in the chart if there were only a few changes that were needed. Otherwise I would crop/readjust the logo and upload it again. Note that whatever your picture looks like, this is how it will come up on the chart. If the picture is tiny and in the upper right corner, you’re going to get a chart with the logo in the upper right corner. So make sure whatever picture you use has your logo or picture clear for you to see. The program allows you to add lines if you want to make more space around the logo to make your blanket look better proportioned.
All settings have to be in place BEFORE the chart is saved. You will not be able to adjust size, etc later in the free version. The premium account allows you to make some changes later on after the chart is saved.
Color Management
StitchFiddle picked up waaaaay more colors than I had expected when I first loaded the logo. I really did NOT want to go heavy on color changes, so I decided to stick to the overall red, white, blue, and grey colors that are primarily seen.
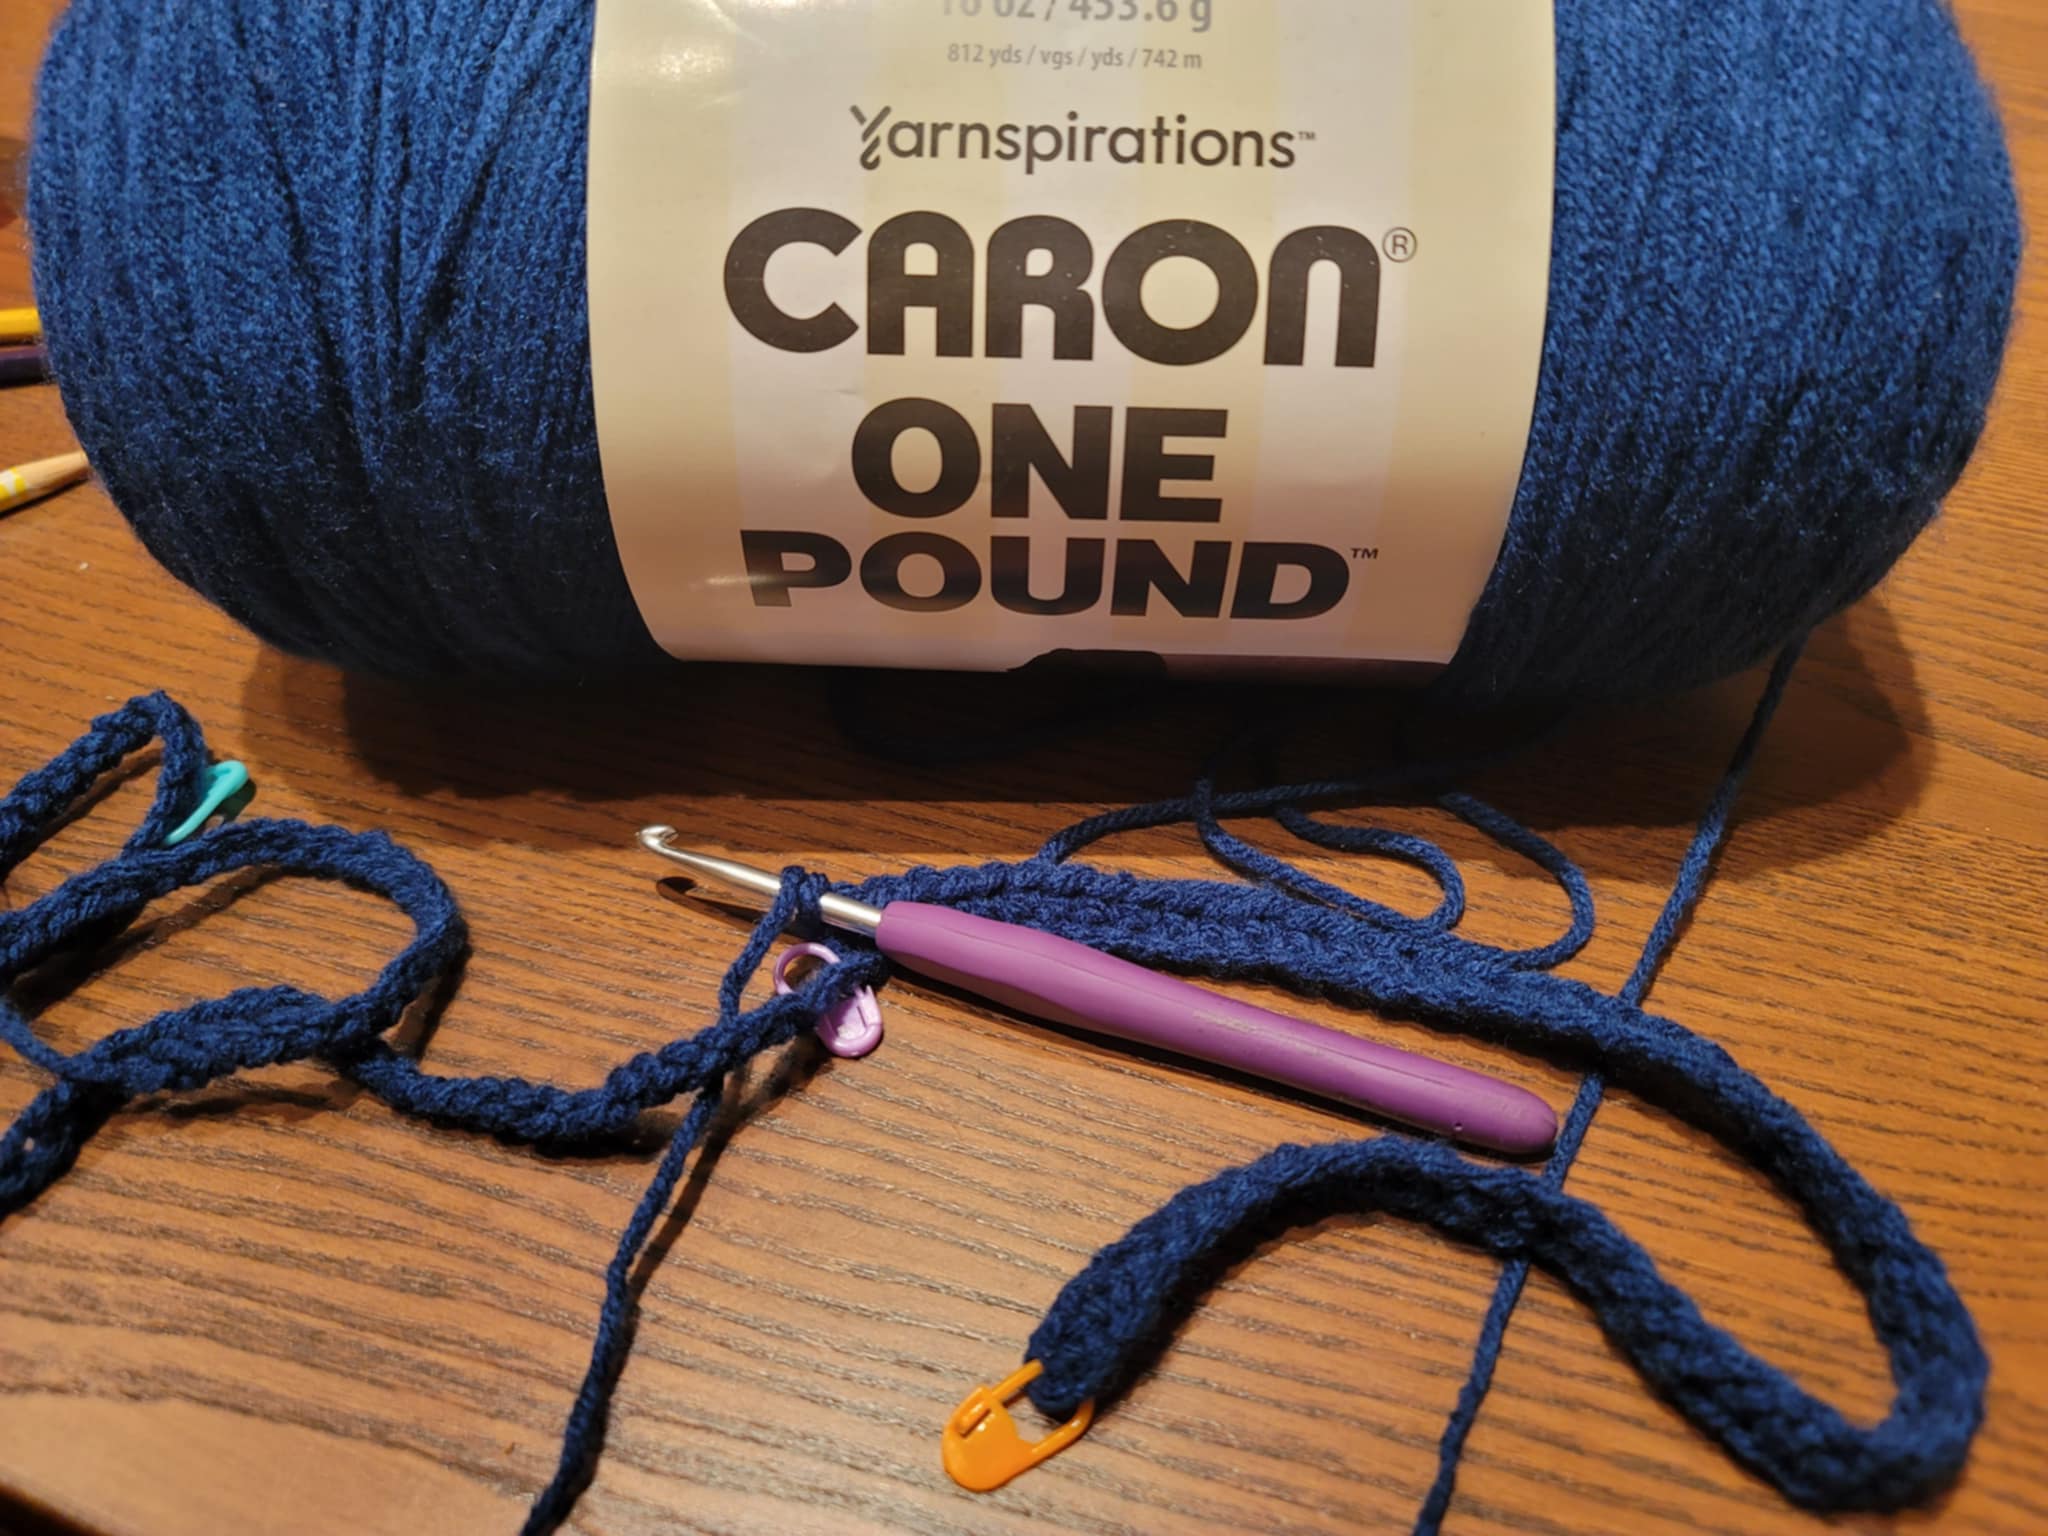
I (literally) went to the yarn store and eyeballed the best colors to use that I thought were the closest to the real logo colors and that were available in multiple skeins.
I decided to use basic colors (not metallic, etc) to keep it simple. I also didn’t want to deal with different size and textures of yarn since I knew doing so would affect the feel and size of the project overall. StitchFiddle worked well for me while I was changing the colors and reducing the number of colors I was using overall.
Stitches vs. Pixels
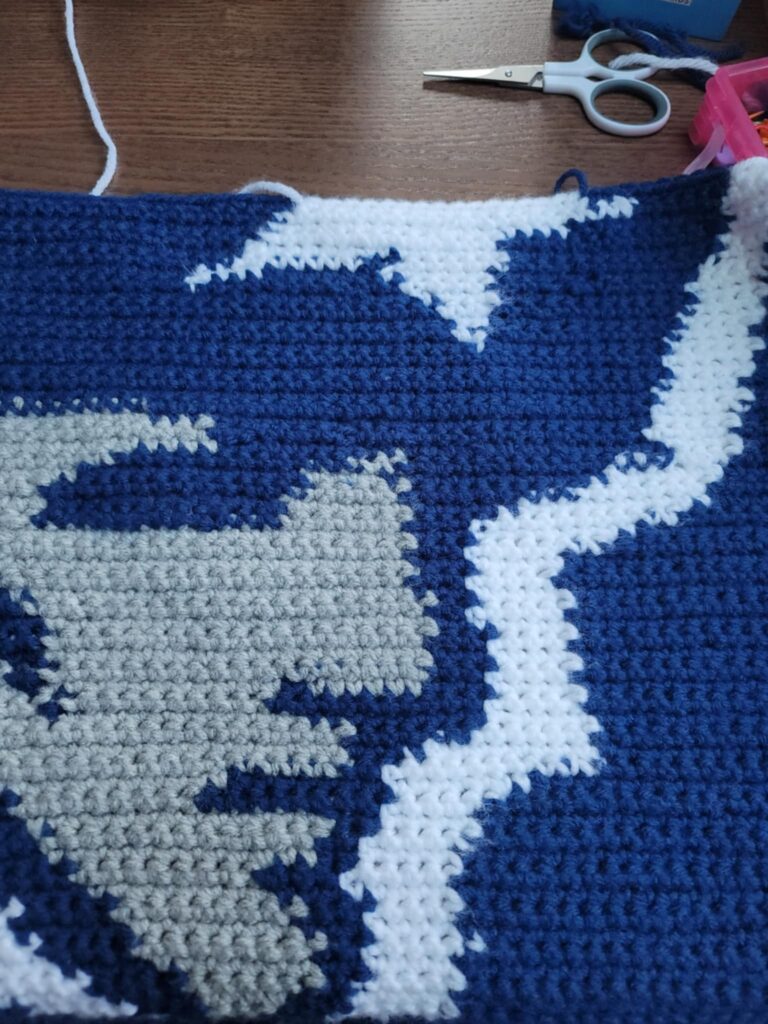
Each stitch is equal to one box on the chart/graph and you can use preset or custom symbols to mark each type of stitch you need to do as well as color. So in the end, this really felt like paint-by-number but in crochet form!
Logo Face Details
I wasn’t too concerned about the face on the logo. It was pretty straight-forward when graphed out so didn’t have to make any major changes. If you are using a design with intricate details, especially in the face, be sure to play around with the stitch colors to get the preferred look.

Size and Scaling
The maximum grid size is 300 x 300 in the free version and 1,000 x 1,000 in the Premium version. I seemed to miss this during the creation of the graph and realized this as I was crocheting and writing this post LOL!
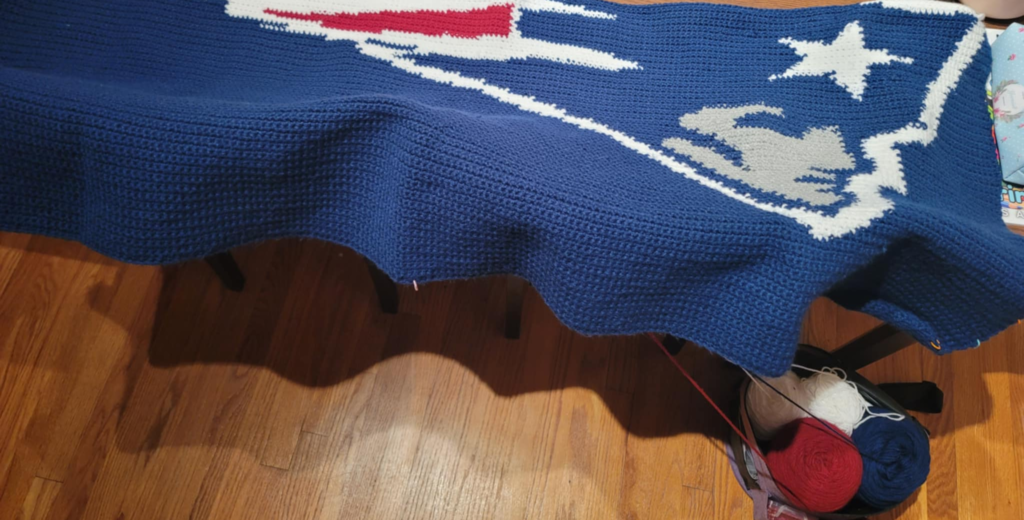
My original plan was to have this blanket be a 60 inch x 80 inch large throw. Because of my own mistakes in the dimensions of the finished project and the size and orientation of the logo photo I was using, I ended up having to add additional rows to the top and the bottom of the blanket I was making to even it out. I also added a small border for a nice finishing touch. In the end, the size of my blanket was different from what I had saved and printed out in StitchFiddle.
Comparing methods (traditional vs other)
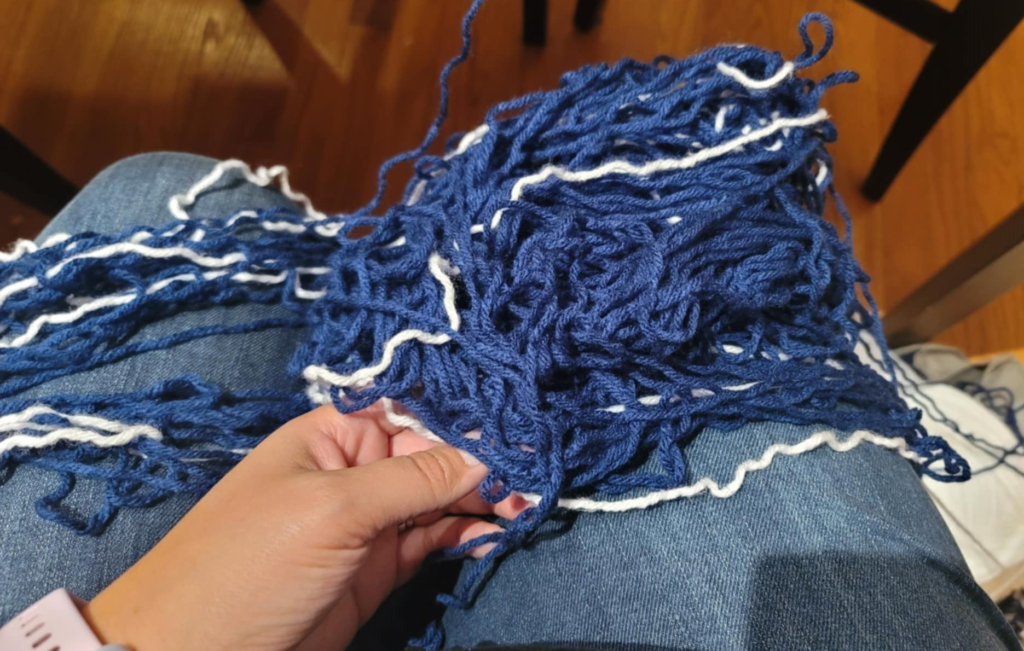
Could I have done this another way? Sure! I first started this logo blanket thinking that I was going to follow a tapestry crochet method (the colors being carried through the whole blanket). Unfortunately I didn’t like the way the inactive colors could still be seen while carrying the yarn through the pattern.

So I tried tighter stitches, but I could still see the other colors and ultimately abandoned the tapestry crochet approach (thanks to my perfectionist tendencies).
Due to the nature of the logo shape and colors, I successfully (mainly) used an intarsia inspired approach. Intarsia was better for large color blocks anyway. Managing tangled bobbins was the biggest drawback of this method, but it was worth it in the end!
As you can imagine, I frogged MULTIPLE times during this process. Thank goodness I started this before Thanksgiving. I got the blanket completed just a few days before Christmas, but would have definitely appreciated more time and less pressure on myself (from myself)!
Practical Tips
- Make a gauge! This is critical to determine how much yarn will be needed and the size for the project.
- Allow plenty of time if you are new to this type of project
- Have a backup plan if your original crochet method does not work the way you hoped
- Do not be afraid to frog (I’ve mentioned this in past posts and I’ll mention it again now. Frogging is NOT failure)
- Use a clear and properly proportioned picture when uploading to StitchFiddle
- Be sure to play with the free version of the program before you commit to a project or the premium version (try using different pictures and playing around with the free design feature too)
The Reaction
When my sister got the gift bag, she slowly pulled the blanket out. I’m pretty sure she knew it was a blanket or something I made for her, but didn’t know what exactly. She absolutely LOVED the blanket!
My sister had no idea that I did not have a pattern for this logo blanket. She seemed to be even more impressed that I used software to graph this out. She had mentioned this blanket over a year ago but I didn’t feel brave enough to attempt it until recently. Other family members were also in awe over the detail and design.
Not only did I get a pride boost, but my sister was delighted! She also got a one of a kind handmade item that is practical and she can keep forever!
My Verdict
I’m so happy I dove in and took the chance to figure this process! It was worth it and I can’t wait to try something else with StitchFiddle knowing what I know now. I would also be curious to try other programs for comparison and see what works best for me.
Your Turn
Have you ever tried a program to graph out a design or do you use pen and paper? Let us know in the comments which you prefer and why!
I can’t believe the level of detail in this blanket! You knocked it out of the park!
Thank you so much! It was an “experience” but I will definitely do it again soon!
What a lovely blanket. well done.
Wow, that’s beautiful! 😍 I used to love crocheting with my older sisters when I was a kid, so I really admire your work. I have to say, the details in this blanket are truly exceptional and stand out to me.
Thank you so much, I appreciate the kind words! Crochet brings me a lot of joy. Ever thought about picking the hook back up again? (hint hint lol)