HDC2TOG Crochet Stitch – What in the alphabet soup is this?
I’ve broken this post out into two sections…the people that just want a reminder (my TL:DR hookers) and the ones who need the whole set of instructions.
DISCLOSURE: This post contains affiliate links, meaning if you click on a product or service, and decide to purchase it, I may receive a commission at no extra cost to you. All recommended products and services are based on my experience with them. For more information, please read my Disclaimer.
For TL:DR people
hdc2tog = half double crochet two stitches together = yo, insert hook, yo and pull through, yo, insert hook into next stitch, yo and pull through, yo, pull through all loops.
Thanks for stopping by, but feel free to stay a while!
Ok, for everyone else, thanks for staying! Lets carry on!
Introduction
Let's talk about the “hdc2tog” crochet stitch today. When I first saw this mentioned in a pattern, I was so confused, I thought I missed a memo! I’m literally laughing at myself while writing this because I remember the feeling like it was yesterday.
What is hdc2tog? This stands for “half double crochet two stitches together, which means you will make two half double crochet stitches across two stitches to turn them into one big stitch. In other words, this is a decrease stitch.
RELATED: Crochet: How to start as a beginner
Decrease Stitches
The hdc2tog crochet stitch falls under the decrease stitches category. It’s an effective stitch that allows you to start ”narrowing in” on your work. Decreases are used frequently in crochet patterns and allow the crocheter to reduce the number of stitches in the row/round they are working.
RELATED: Ultimate guide to crochet techniques
Videos versus Written Instructions
Videos are a fantastic way to learn how to do crochet stitches, but sometimes I just like things written out. Especially if I’m somewhere that’s inconvenient to watch a video. There are also times when I crochet and don’t want to be distracted by videos because I know at some point I will end up going down the “YouTube rabbit hole” and then I'll be wondering how two hours have passed with nothing to show for it! So here are some written instructions with pictures for reference that you can reference whenever you need it.
HDC2TOG crochet stitch tutorial
We are going to break this down into micro steps so you can see the stitches and how it's done. In the pictures I'm using the Woobles Easy Peasy Yarn since it's great for beginners and you can see the stitches very clearly. This yarn is used a lot for beginner amigurumi, but I'm using it for demonstration purposes today.
Picture Tutorial
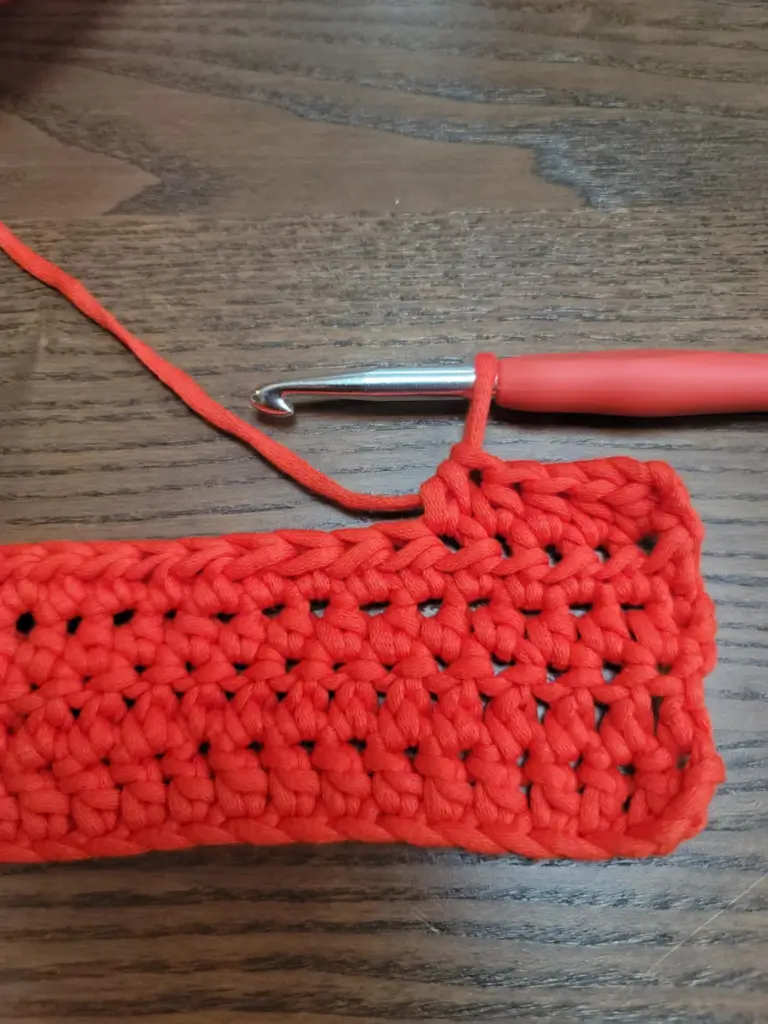
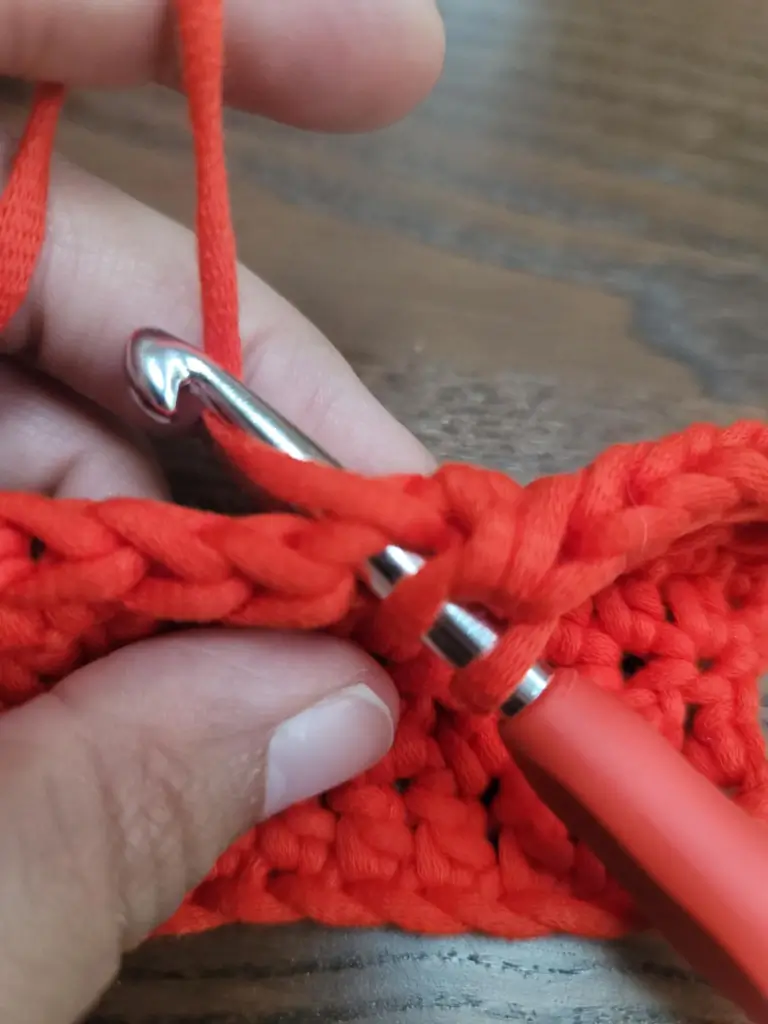
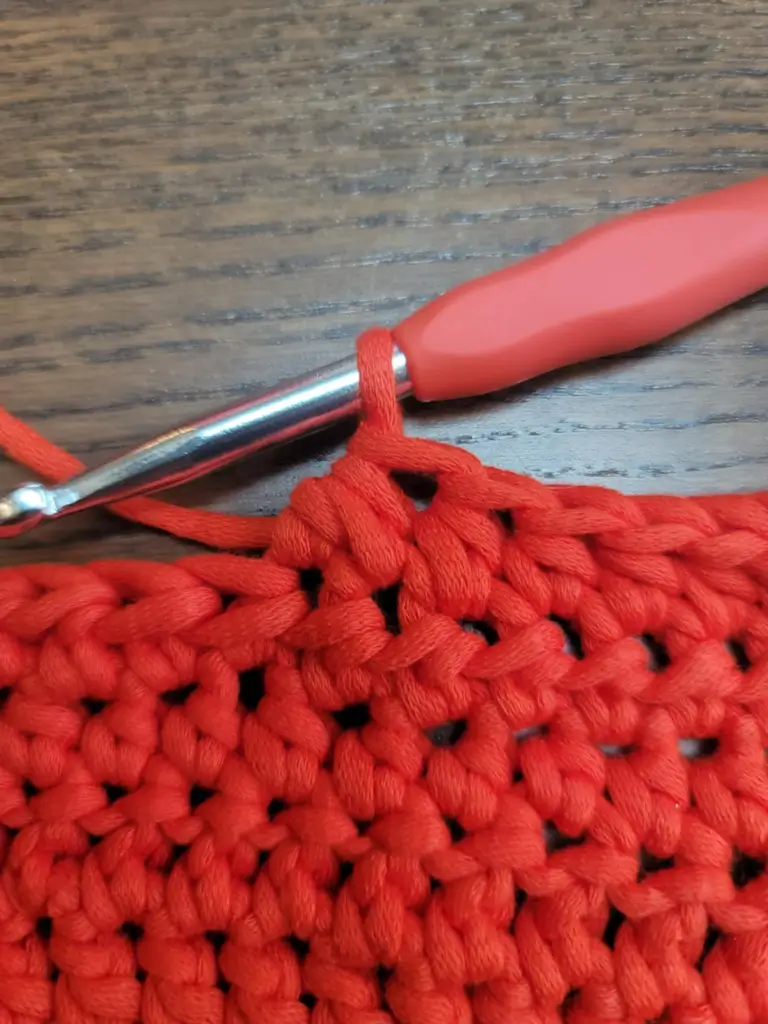
Written Steps
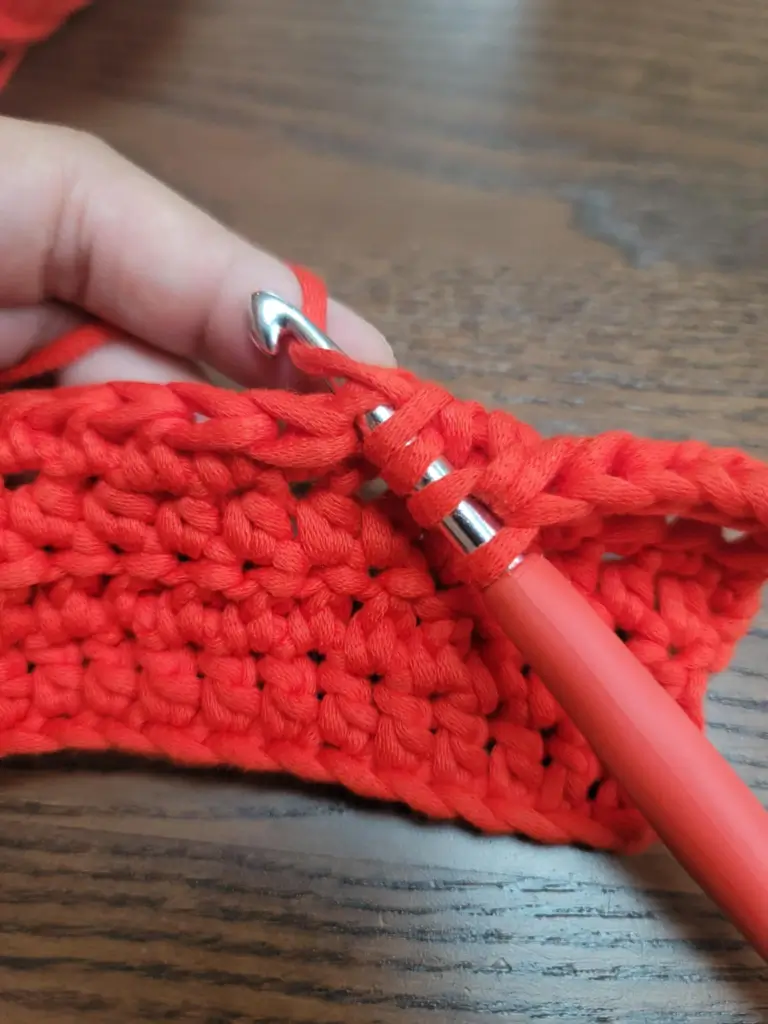
- You should be starting with one loop on your crochet hook (from your previous stitch)
- Yarn over (2 loops on hook now)
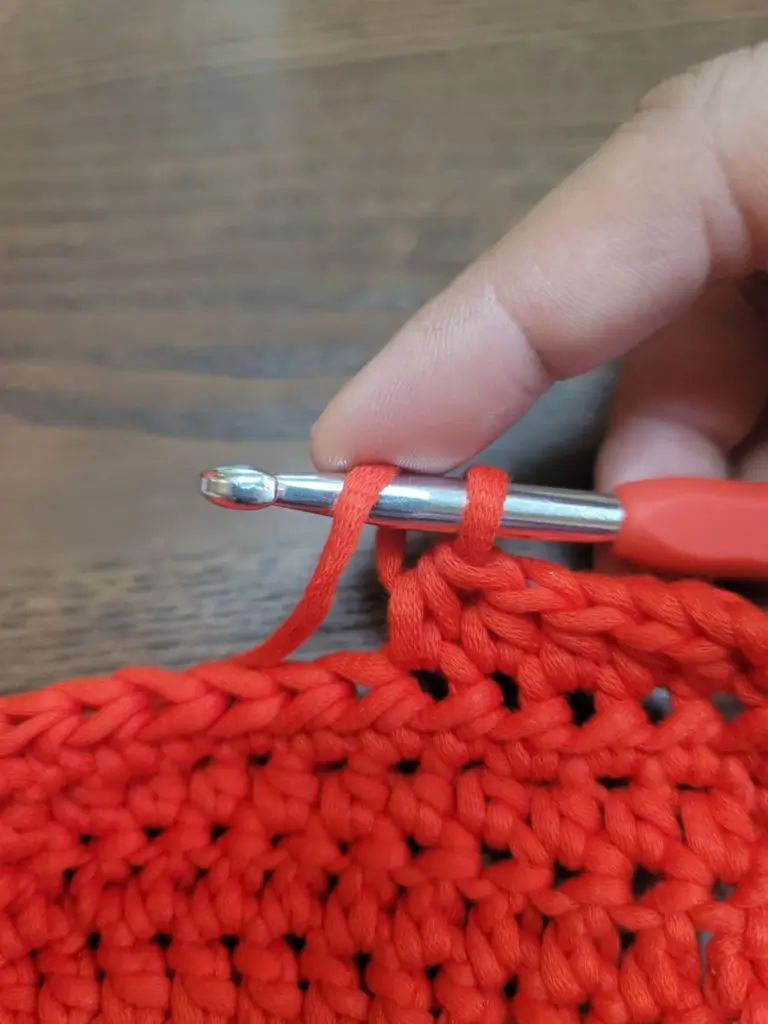
- Insert hook into the next stitch
- Yarn over
- Pull through (you should now have 3 loops on your hook)
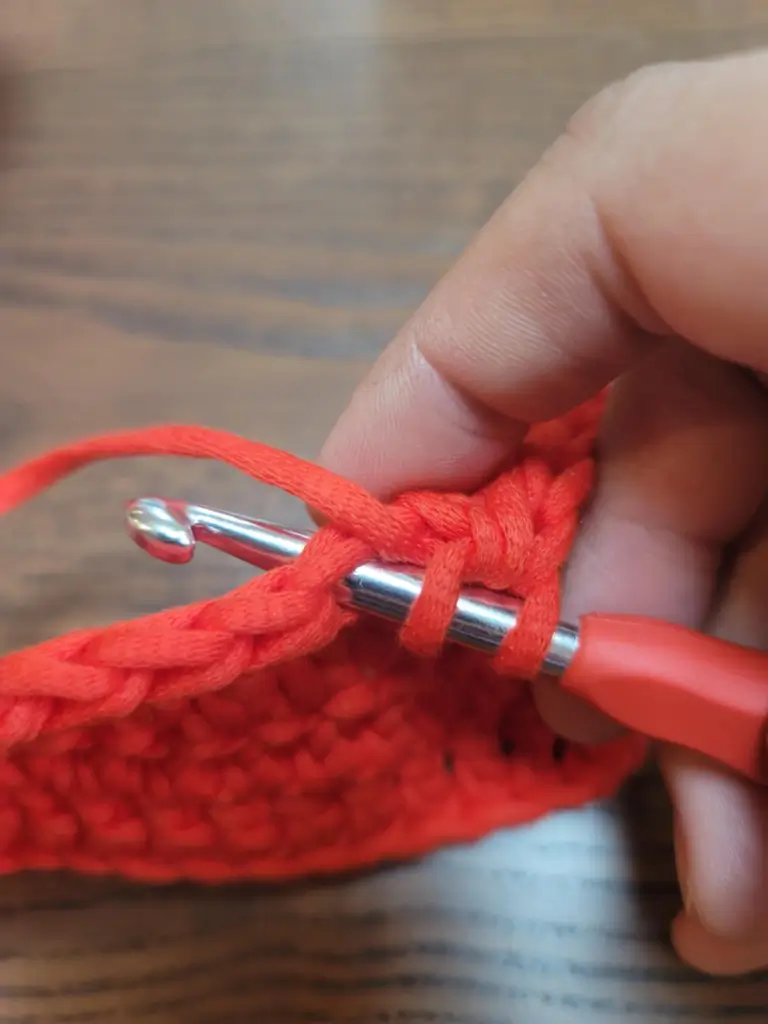
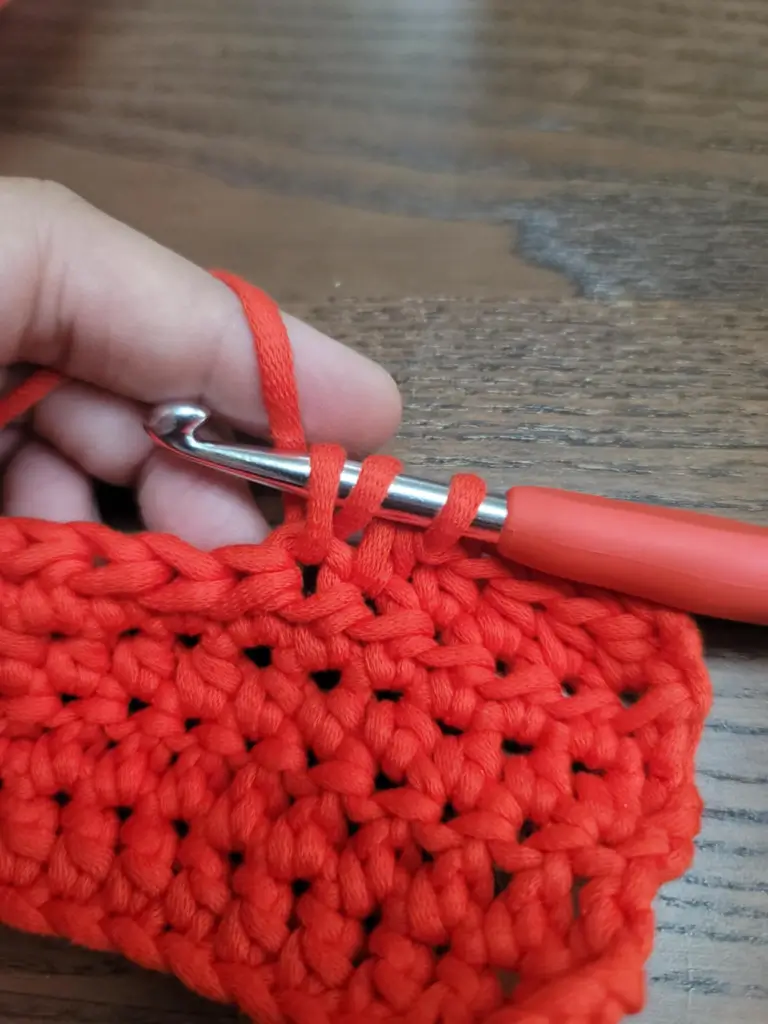
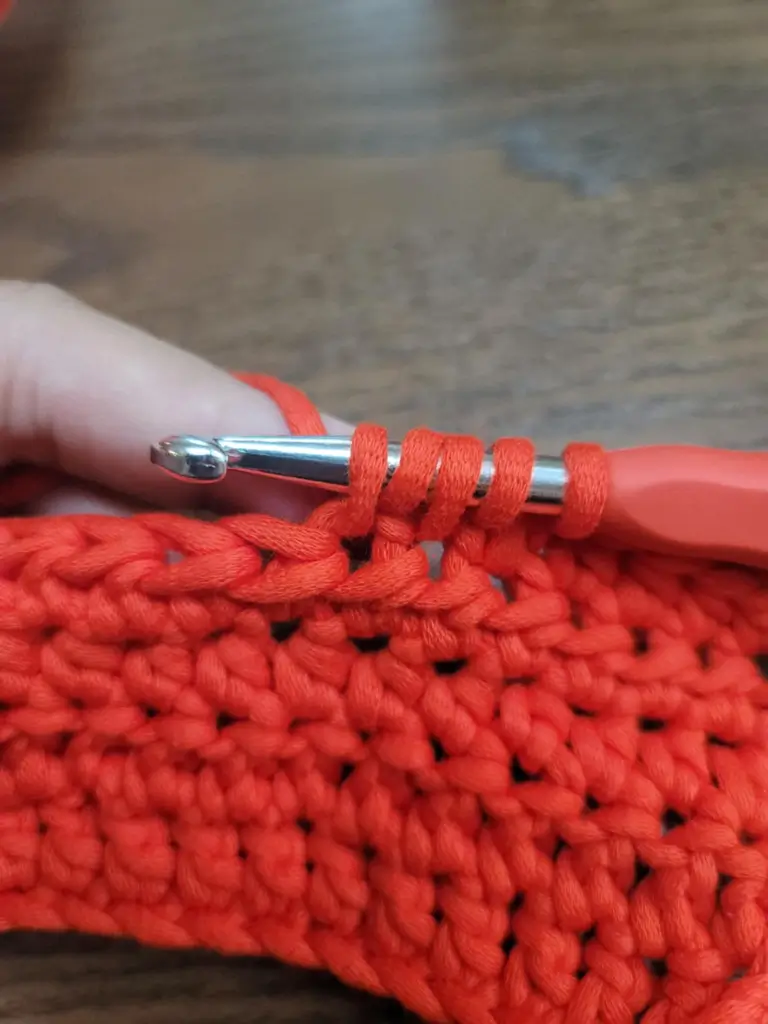
- Yarn over
- Insert the crochet hook into the next stitch
- Yarn over
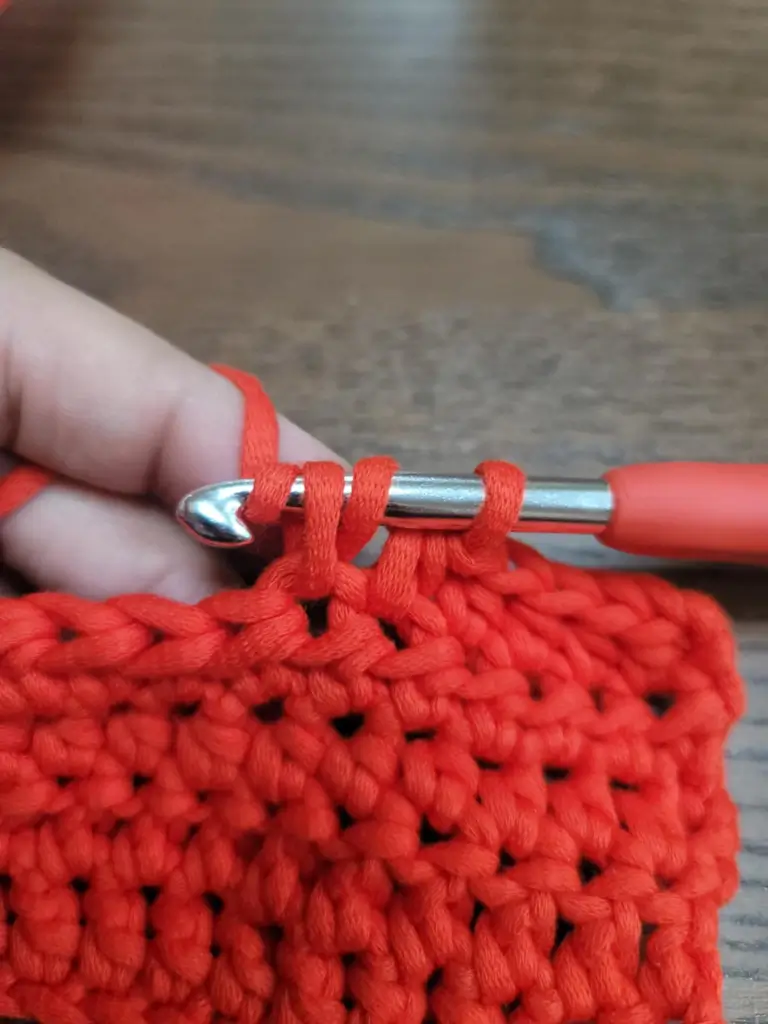
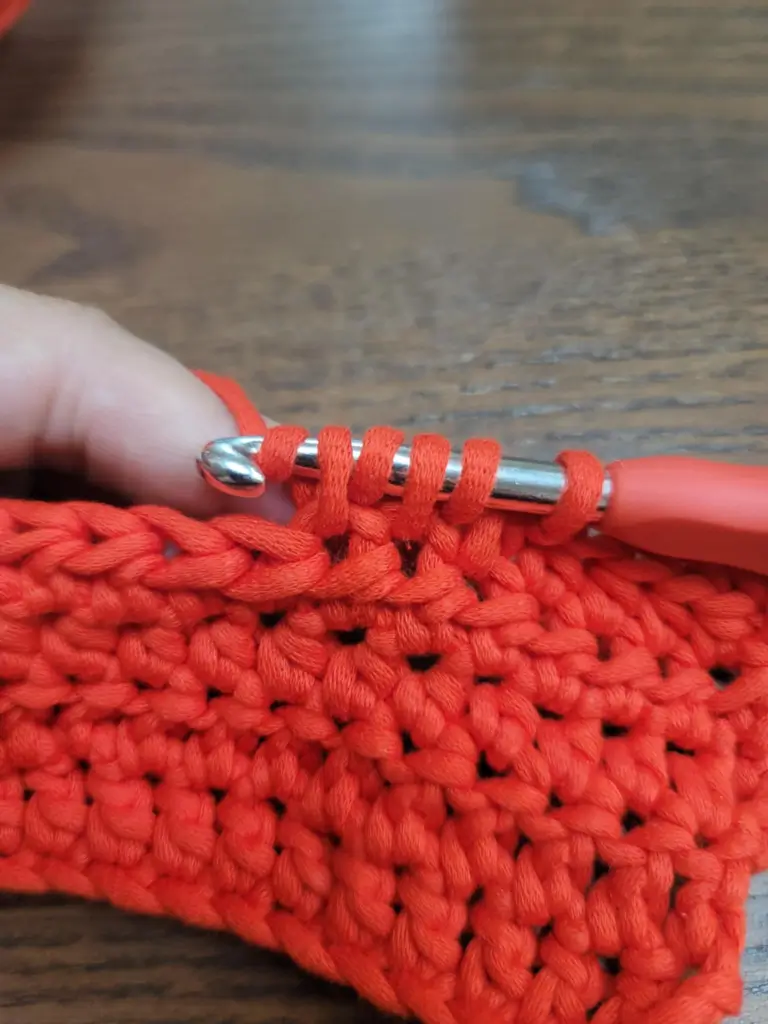
- Pull through (you should have 5 loops on your hook now)
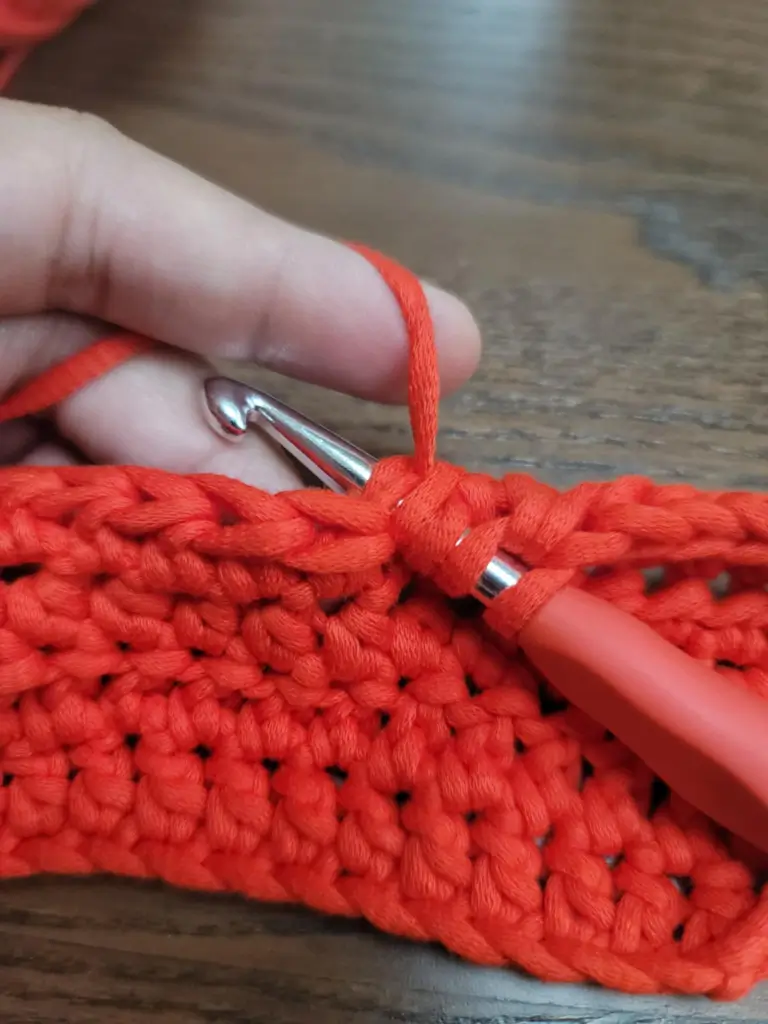
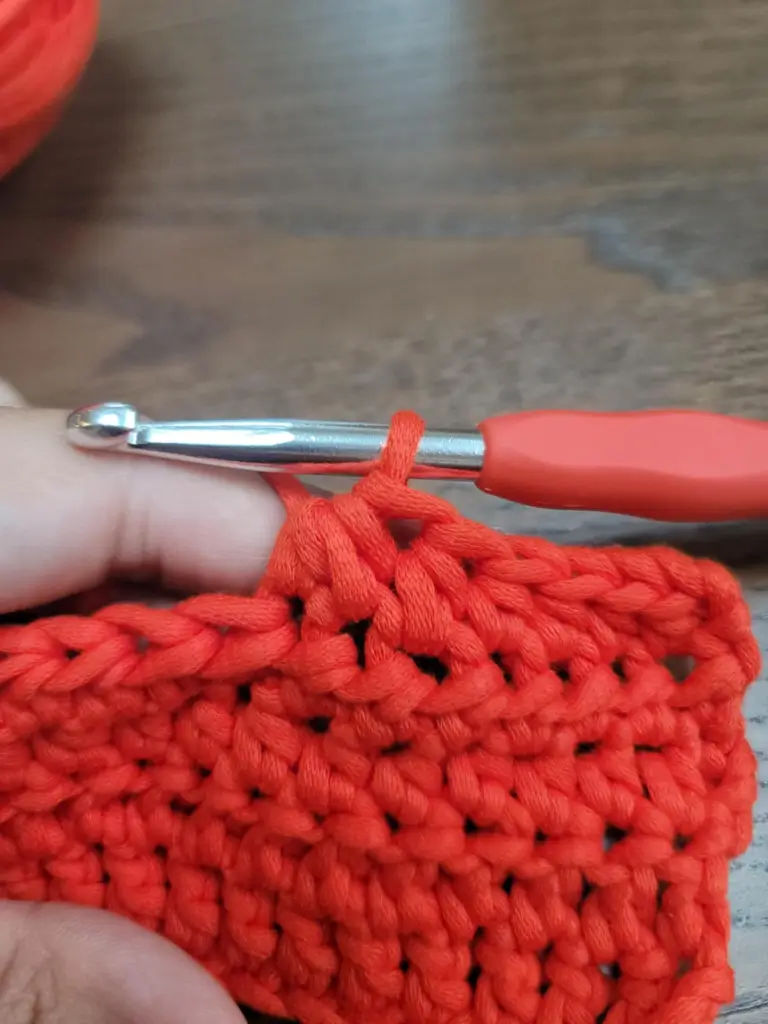
- Yarn over
- Pull through all loops on your hook so that you finish with only one loop on your hook (you should have 1 loop on your hook now)
The stitch sounds bonkers and it feels like you're knitting on your crochet hook but it's a great stitch to remember since it’s used in many patterns. (Welcome to the fundamentals of Tunisian crochet by the way!)
Still need a video to reference? I’m not going to recreate the wheel, so here is a video from Fiber Flux that helped me through it:
Thank you to Fiber Flux for the great video!
Variations to hdc2tog
You’ll find lots of information out there about how to do this stitch. Some people do not do a second yarn over before going into the second stitch. I do the second yarn over because the stitch is described as 2 hdc (hdc in one stitch and then another hdc in the next stitch) being combined into one.
My brain registers no yarn over on the second stitch as 1st stitch = hdc, 2nd stitch=sc. We would be using 2 different stitches in our decrease, which is not the intent of this stitch. I am not professionally trained in crochet, but the above steps are the way I have been doing it and it has been working great.
Summary
I hope this helps to clarify this stitch, even if there are some variations to this (as well as many known stitches out there in the crochet industry). As always, do what works (and looks) best in your project. It’s OK to modify and change things up a bit sometimes, that's what makes crochet so fantastic!
Also since this is a decrease stitch, it doesn’t destroy your project if you do the second yarn over or not because you still end up with only one stitch in the end, so it’s going to be more of a personal preference in how the variations look compared to the look of your project. Be sure to have fun and keep crafting!
Are there any stitches that you are stuck on? Let me know in the comments!


Great step-by-step instruction photos, thank you!
You’re welcome!
A super valuable post to learn about the hdc2tog. So helpful!
Thank you!
Thank you for creating such a detailed guide. It’s clear and well-structured, and I’m sure it will help so many people who love crocheting.
Thank you for your kind words!
I’ve never heard of hdc2tog before, so this was super helpful—I definitely learned something new! I love how you explained it in such a simple, friendly way. It makes it way less intimidating for someone like me who’s still figuring things out!
Happy to help! If you get into pattern reading you’ll find A LOT of abbreviations and some of them can be a little overwhelming the first time you see them. We can do hard things!
Thank you for this helpful HDC2TOG crochet stitch tutorial! I love both the pictures and written instructions!
You’re welcome! Happy to help!
I’ve never heard of the HDC2TOG stitch, but your step-by-step explanation helped me understand it a bit better. I love how versatile this stitch is—perfect for shaping projects without making them too bulky. One of these days I’ll be experienced enough to give it a try.
It’s more of an intermediate level stitch in my opinion since you’d be doing more “shaping” in projects. When you get a pattern with one of these you’ll see what I mean 🙂
It sounds a lot harder than it really is, right??
Thanks for the instructions and guide!
Everything is easier when it’s broken down into understandable and reasonable steps!