Oops, All Mistakes
A Field Guide to Common Crochet Disasters (And How to Fix Them)
You're working along on your project, feeling great about it and making good progress. With a sense of accomplishment, you hold it up to admire your work and….wait, why is it shaped like that?
It was supposed to be a rectangle. It's definitely not a rectangle. It's some kind of shape that shouldn't exist?! Or maybe it started as a square and now it's clearly trying to become a circle. Perhaps it was supposed to get bigger but it's somehow shrinking instead?
Say “hello” to common crochet mistakes. Everyone has made these mistakes at some point in crafting. Every crocheter, no matter their skill level, has created wonky shapes, mystery increases, and projects that accidentally seem to defy the laws of physics.
Today we're celebrating our beautiful disasters, reviewing some of the most common mistakes we all make, and learning when to fix them versus when to just lean into the chaos and call it “artistic interpretation.”
DISCLOSURE: This post contains affiliate links, meaning if you click on a product or service, and decide to purchase it, I may receive a commission at no extra cost to you. All recommended products and services are based on my experience with them. For more information, please read my Disclaimer.
Mystery Increases
Let's start with a classic: your project is getting bigger when it shouldn't be.
You started with 50 stitches. Somewhere along the way, you now have 53. Then 55, then 58. Your rectangle is slowly morphing into a trapezoid, and you have no idea when or how this happened.
Common causes:
- Working into the top of the turning chain when you shouldn't. This is the #1 culprit. If your pattern says “chain 2, turn” and doesn't count that chain as a stitch, but you're working into it anyway on the next row, you're adding a stitch each row. Sometimes the turning chain counts as a stitch. Sometimes it doesn't. Different patterns do it differently. There are times when the SAME PATTERN does it differently depending on the stitch type. Be sure to check the pattern instructions.
- Accidentally working two stitches into one space. Your hook slips, you're not paying attention, or it’s hard to determine where the stitch actually is. Suddenly you have two stitches where there should be one.
- Mistaking a gap for a stitch. Sometimes the space between stitches looks like it should have a stitch in it when it shouldn’t.
- Combining stitches by accident: Sometimes we increase on purpose… and then forget we did it and keep increasing. This creates growth and suddenly your coaster turns into a blanket.
- Accidentally work increases when following a pattern: The pattern says “2 dc in next st, dc in next 4 sts” and we read it as “2 dc in each of next 5 sts” and suddenly we've added way too many stitches. (I’ve done this plenty of times *facepalm*)
How to spot it early
Count your stitches at the end of every row, especially when you're starting a new pattern. Yes, it's annoying. But YES, it catches problems before they compound.
Quick fixes
- If you catch it within a row or two, frog back and fix it
- If it's been going on for a while, strategically place decreases on your next row to get back to the right count
- Learn your pattern's turning chain rules and mark the first stitch of each row with a stitch marker (remember when I said in past posts you can’t have too many stitch markers?!)
Prevention
- Read pattern instructions twice before starting
- Use a highlighter or pen to mark pattern repeats
- Count your stitches after increased rows (you’re more likely to make errors on these rows)

Mystery Decreases
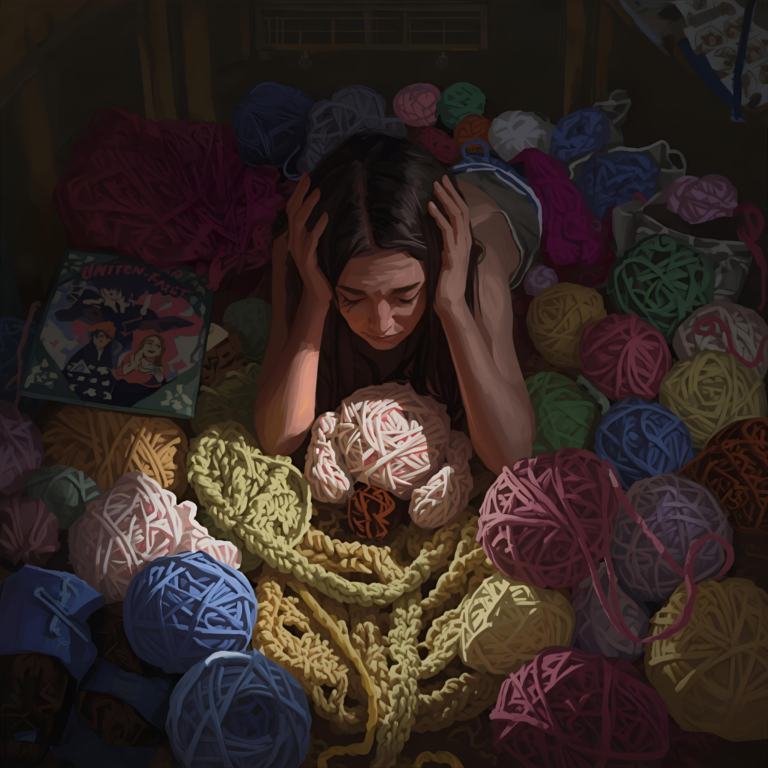
The opposite problem: your project is shrinking and you have no idea why. You started with 100 stitches. Now you have 97. Next row you count and it's 94. Your blanket is shrinking before your eyes and you feel like your brain is no longer functioning.
Common causes
- Missing the first or last stitch of rows. This is INCREDIBLY common. The first stitch can be hard to see, especially in sc. The last stitch is easy to skip if you're not watching carefully, or haven’t placed a stitch marker.
- Not working into the last stitch before the turning chain. We get to the end of the row and think “okay, turning chain is next!” but there's actually one more stitch to work before we turn. (STITCH MARKER!!!)
- Accidentally skipping stitches. We're tired, we're distracted, we lose our place, and we skip a stitch without noticing.
- Working decreases when we shouldn't. The pattern says “sc2tog” and we do it. Then we forget we already decreased and do it again. Or we misread and decrease when we shouldn’t.
How to spot it early
Again: count your stitches. Every row. At least until you're confident in the pattern. Catching a missing stitch after one row is easy. Catching it after ten rows is a nightmare.
Quick fixes
- Mark the first and last stitch of each row with stitch markers
- When you get to the end of a row, make sure your last stitch is RIGHT BEFORE the turning chain from the previous row
- If you've lost multiple stitches, work small increases evenly across your next row to get back to count
Missing The First Or Last Stitch (Every. Single. Time.)
Let's focus on this because it's the biggest culprit of shrinking projects.
Why the first stitch is hard to find: In single crochet especially, the first stitch can hide under the turning chain. It looks like it might BE the turning chain. Or it looks like it's behind the turning chain and not a real stitch. We skip it and move on.
Solution: Mark the first stitch with a stitch marker before you turn. Then you always know where to put your first stitch of the new row. (By now you should be saying to yourself, “I should use stitch markers!”)
Why the last stitch is hard to find: We get to the end of the row, see the turning chain from the previous row, and think we're done. But there's actually one more stitch to work, the one right before that turning chain. We skip it and turn, and we've lost a stitch.
Solution: Mark the last stitch too. Count as you go or get in the habit of looking for that last stitch before the turning chain from below.
Turning Chain Troubles
Turning chains are surprisingly complicated for something that seems so simple.
Forgetting To Chain At Row Start
You finish a row, flip your work, and immediately start working stitches. Wait. Weren't you supposed to chain first? Oops.
This creates short rows, weird edges, and general wonkiness. It's easy to do when you're in a rhythm and on autopilot, so don’t feel bad.
Prevention:
- Say it out loud: “Chain and turn” instead of just “turn”
- Make the turning chain BEFORE you flip your work (some people find this helps)
- If you forget, you can carefully undo the first stitch and add the chain, but it's finicky
Not Counting Turning Chains As Stitches (When You Should)
We covered this above but I'm going to say it again: when the turning chain counts as a stitch, you need to work into the top of it on the next row. If you don't, you're losing a stitch every row.
Counting Them When You Shouldn't
The opposite of the above problem: the pattern says the turning chain doesn't count, but you're working into it anyway. This adds a stitch every row.
The Pattern Doesn't Specify
Sometimes patterns are poorly written and don't tell you whether the turning chain counts or not.
Starting In The Wrong Stitch
This one is frustrating because it seems like it should be simple, but it's not.
Chain vs. First Real Stitch
You've made your foundation chain. Time to start the first row. You put your hook into… which
Why we mess it up:
- We miscount
- We're not sure which chain is “first”
- We forget that the working chain doesn't count
- Different tutorials explain it differently and we get confused
Solution: Count out loud, starting from the second chain: “First chain” (pointing at second chain from hook), “second chain,” etc. This helps your brain map where to start. It sounds silly but actually works!
The “Which Loop Do I Go Into?” Crisis
Are you going under one loop? Both loops? The back loop? The front loop? Under the bump on the back of the chain?
Standard answer: For foundation chains, most patterns want you to work under two loops (the V on top of the chain). But some patterns specify working under the back bump only, which creates a nicer edge.
For subsequent rows: Usually you work under both loops of the stitch unless the pattern says otherwise (BLO = back loop only, FLO = front loop only).
When in doubt: Look at the pattern photos. Look at video tutorials for that specific pattern. Working under the wrong loops won't ruin your project, but it will look different from the pattern.

Marking It For Future Rows
Once you figure out where the first stitch is, MARK IT with a stitch marker. This way on the next row, you know exactly where to start. This solves so many problems.
Gauge Changes Mid-Project (The Tension Betrayal)
Your gauge was perfect when you started. Somehow, halfway through, it's completely different.
You Relaxed And Now It's Huge
A very common issue. You start a project and you're nervous and focused. Your stitches are tight and even. Then you get comfortable. You relax. You zone out. Your stitches get looser. Your gauge changes.
Suddenly the first half of your blanket is noticeably tighter than the second half. It might even be a different size.
Why it happens: Tension is affected by stress, focus, fatigue, and muscle memory. As you relax into the project, your natural tension emerges, which might be looser than your “trying hard” tension.
Can you fix it without frogging? Sometimes. Blocking can help even things out a bit. Aggressive blocking can hide minor differences. But if the gauge change is dramatic, blocking won't fully fix it.
Prevention:
- Check your gauge periodically throughout the project, not just at the start
- Try to maintain consistent tension (this comes with practice)
- Work at the same time of day if possible (tired you crochets differently than fresh you)
You Got Tense And Now It's Tight
The opposite problem: something stressed you out mid-project and your stitches got tighter. Now the second half is smaller and stiffer than the first half.
Why it happens: Stress, frustration, trying to work faster, or holding your hook differently can all tighten your tension.
Fix: Consciously relax. Take breaks. Stretch your hands. Try to return to your original tension. Block aggressively to even things out.
Stress, Fatigue, And Hand Position
All of these affect your gauge:
- Fatigue: Tired hands create inconsistent tension
- Stress: Stress tightens everything, including your stitches
- Hand position: Changing how you hold your hook or yarn changes your tension
- Different furniture: Crocheting on the couch vs. at a table changes your posture and tension
- Temperature: Cold hands crochet differently than warm hands
The reality: Perfectly consistent gauge across an entire large project is nearly impossible. Minor variations are normal and usually don't matter.
Accidental Joins & Attachments
Sometimes your project attaches itself to things. It shouldn't. But it does.
Crocheting Your Project To Your Shirt
You're working along, everything's fine, and then you realize you've crocheted THROUGH your shirt. Your project is now attached to your clothing.
How does this happen? Usually you're wearing something with an open weave (sweater, loose knit shirt) and your hook goes through your project AND through your shirt without you noticing. You work several stitches before you realize.
Fix: Carefully undo the stitches and free your shirt. Check your working area before each stitch to make sure you're only hooking your project.
Prevention: Wear tight-weave clothing while you crochet. Or crochet naked. (Kidding. Mostly.)
Accidentally Joining Two Pieces
You're working on a cardigan with two separate front panels. You set them both in your lap. Somehow, while working on one, you've attached it to the other.
How it happens: The pieces are too close together, yarn gets tangled between them, your hook grabs both pieces, chaos ensues.
Prevention: Work on pieces in separate sessions, or keep them in separate bags, or at minimum keep them on opposite sides of your lap.
The Blanket That Grabbed Your Couch
Large projects like blankets can somehow attach themselves to couch cushions, pillows, or other furniture. You stand up and the blanket is stuck.
How it happens: Yarn wraps around things. Hooks catch on fabric. Stitch markers clip onto upholstery.
Prevention: Work on a clear lap blanket or use a project mat. Keep your work contained.
Crocheting Through Your Project Bag (How?!)
You're working on your project while it's in your project bag. Efficient! Except somehow you've crocheted through the bag itself. Your project is now part of the bag. They're married.
How it happens: Your hook goes through the fabric of the bag without you noticing. Especially common with canvas or fabric bags.
Fix: Carefully undo and separate them. Switch to a plastic or tightly-woven bag.
The “I Thought This Was A Square” Phenomenon
You started with a square. You were making a square. You look at it now and it's definitely not a square.
Geometry Is Apparently Hard
Squares should be easy. Four equal sides. Four right angles. Simple geometry. And yet we mess them up constantly.
Why squares go wonky:
- Uneven tension across different sides
- Missing or adding stitches without noticing
- Not working the corners correctly (too many or too few stitches in corner)
- Some stitches naturally pull more than others
Common square problems:
- Your sides are equal length but your angles are wrong (tension issue)
- Your sides aren't equal length (stitch count issue)
- Developing wavy edges: Too many stitches in the sides, not enough in corners
- Cupping or ruffling: Tension too tight or too loose
Why Squares Become Wonky
Tension issues across different stitch types: If your square uses different stitches on different sides or rounds, your tension might vary between stitch types. Your dc might be looser than your sc, creating uneven sides.
Corner construction errors: Most square patterns put 3 stitches, or 2 stitches + a chain, or some cluster into corners. If you mess up the corner math, your square won't have proper right angles.
Ignoring the pattern's gauge: If the pattern says use a certain hook size and you're using something different, your square might not be square even if your stitch count is right.
How To Fix It (Or Embrace The Organic Shape)
Fixes that might work:
- Block it aggressively, pinning it into a square shape
- Adjust your tension consciously on subsequent squares
- Count every round/row to ensure you're not gaining/losing stitches
- Make a gauge swatch to nail down proper hook size
Or: Accept that it's a “rustic square” or an “organic square” and embrace the imperfection. Honestly, in a blanket of 50 squares, slight variations add character. They prove it's handmade.
When To Fix vs. When To Embrace
Here's the big question: when do you fix mistakes, and when do you just let them be?
Not Every Mistake Needs Fixing
Ask yourself:
- Is it structural? If yes, fix it. If it's just aesthetic, maybe not.
- Will it affect function? If your sweater won't fit because of the mistake, fix it. If your blanket is slightly crooked but still warm, embrace it.
- Will anyone else notice? Probably not. We see our mistakes because we made them. Others just see “wow, you made that!”
- How much will fixing it cost you? If fixing means frogging 20 hours of work, maybe the mistake is fine actually.
The “Will Anyone Notice?” Test
Hold your project at arm's length. If you can't see the mistake from there, no one else will notice it either. We're all too close to our own work.
Also: most people don't know what crochet is “supposed” to look like. They just know your blanket is cozy or your hat is cute. They're not counting your stitches.
Calling It “Artistic Interpretation”
Some of the best design choices started as mistakes. Embrace them. If you present it as intentional, people will believe you.
When Perfectionism Hurts More Than Helps
Perfectionism can prevent you from ever finishing projects. If you frog every time something is slightly off, you'll never complete anything.
Sometimes good enough IS perfect. Handmade doesn't mean flawless—it means made with care. Your care is evident even if your stitch count wavered.
Give yourself permission to be human. Make mistakes. Keep going anyway.
Quick-Fix Techniques
When you decide a mistake IS worth fixing, here are some techniques:
The “Surface Slip Stitch” Cover-Up
If you have a small hole or gap, you can surface slip stitch over it (working on top of the fabric) to close it up. This works best with busy stitch patterns where a little camouflage goes unnoticed.
Strategic Embellishment Placement
Got a mistake you can't fix? Put an appliqué over it. Or a flower. Or a button. Or some embroidery. Problem solved AND you've added decorative interest!
Adding Texture To Hide Sins
If one section looks different from the rest, add texture everywhere so it all looks intentionally varied. Bobbles, popcorn stitches, or surface crochet can disguise a multitude of sins.
The Blocking Miracle Worker
Blocking fixes more than you'd think. Uneven stitches? Blocking. Weird gauge? Blocking. Slightly wrong shape? Blocking. Not all mistakes block out, but many do. Always try blocking before you frog.
When To Just Frog That Section
Sometimes the best thing is to frog back to where the mistake started and redo it correctly. If the mistake is recent and obvious, frogging is often faster than trying to fix it creatively.
Seaming Tricks That Hide Mistakes
If you're joining pieces together, strategic seaming can hide edge issues. The seam covers a lot. Use this to your advantage.
The Bottom Line
Mistakes don't make you a bad crocheter. Everyone makes these mistakes. The difference between beginners and experts isn't whether they make mistakes; it's how they handle them.
Experts have made all these mistakes enough times to:
- Recognize them quickly
- Know whether they're worth fixing
- Fix them efficiently when needed
- Not beat themselves up about it
You'll get there too. Every mistake is a learning opportunity. Every project that grows or shrinks without permission shows you what to watch for next time.
So make mistakes. Make ALL the mistakes and learn from them. Laugh at them, fix the ones worth fixing, and embrace the rest. Because perfect is boring, and handmade means human, and humans mess up sometimes.
Your Turn!
What's your favorite mistake you've made? Do you have a disaster story with a happy ending? Are you team fix-everything or team embrace-the-chaos? Share your best “oops” moments in the comments!
And if you have clever fixes or workarounds for common mistakes, please share! We're all learning together here.
Crochet Confessions Series – Series Finale!
This is Part 6 (the finale!) of my Crochet Confessions series! Thanks for following along through all our crafting disasters. Catch up on previous posts:
- Part 1: Yarn Chicken – The high-stakes game we all play
- Part 2: The Art of Frogging – When your project needs a swan dive
- Part 3: Tangled – A love-hate letter to yarn barf
- Part 4: Lost Count Syndrome – When your brain stops working
- Part 5: Second Sock Syndrome – Why finishing is hard
- Part 6: Oops, All Mistakes ← You are here!
Series Complete!
I hope this series has made you laugh, feel less alone in your crafting struggles, and given you some practical solutions for the chaos. Remember: we're all making mistakes, losing count, playing yarn chicken, and frogging projects. You're in good company.
If you enjoyed this series, subscribe to the newsletter for future posts, tutorials, and more crochet content. And if you have ideas for topics you'd like to see covered next, drop them in the comments!
Happy hooking, and may your mistakes be minor and your finished objects plentiful!
What mistake would you add to this list? What's YOUR signature crochet disaster? Tell us in the comments!


A very thorough and clear guide. Thank you
You’re welcome and thank you for reading!
Love this! Embracing mistakes is what helps us learn and improve!
Yes, we need to flip the negative about mistakes!
Great tips thank you.